Thousands of courses for $10 728x90

الثلاثاء، 24 يوليو 2018

The long road to reach a pensions cold-calling ban

Old phone

Savers continue to wait for a ban on pension cold calling to take force as the government has yet again delayed implementation.

A ban, which will take the form of an amendment to the Financial Guidance and Claims Bill, was first announced on 20 August 2017 by the Department for Work and Pensions (DWP).

But on 12 July this year, the minister responsible for the amendment, John Glen MP, issued a statement to Parliament explaining that the ban was a “complex issue” and admitting that it would be autumn before legislation was laid before Parliament.

Back in August 2017, former pensions minister Baroness Ros Altmann welcomed the announcement, explaining: “Cold calling for mortgages was banned years ago, and the public needs the same protection for other financial matters. People can only be approached about a mortgage if they have expressly requested contact from the company by name. Doing the same for pensions would be a significant step forward in protecting the public.”

But since then, the government has failed to set a specific date or timeline for the ban.

By December 2017, the Work and Pensions Committee stepped in, urging the government to act to ban pension cold calling immediately. According to the committee, official figures “grossly underestimated” the scale of pensions scams and Frank Field MP, the chair of the committee, demanded the government act.

On 13 February this year, the government responded to the committee’s critical report but, again, failed to set a timeline for the ban.

Tom Selby, senior analyst at financial provider AJ Bell, commented at the time: “It has now been well over a year since the ban was originally announced and almost three years since the pension freedoms were launched. It is unacceptable that policymakers have taken so long to introduce such an important consumer protection measure, and implementation should now be fast-tracked.”

In March the government finally tabled an amendment to the bill which would introduce a ban. Crucially, the amendment stated:

“If the power is not exercised by June, the secretary of state must explain to Parliament why not.”

But this deadline was not met, forcing Mr Glen to issue a statement on the delay. Former pensions minister Steve Webb derided the issuing of this statement on the same day as the Brexit white paper and the controversial visit of US President Trump as a “good day to bury bad news”.

Mr Selby concludes: “While ministers delay, millions of hard-working savers are at greater risk of being targeted by financial fraudsters.”

A further technical consultation on a cold-calling ban has now been announced.

Section

Free Tag

Related stories

Twitter


Source Moneywise https://ift.tt/2uNawkj

Gaming board OKs Mount Airy's casino application extension request

NEW CASTLE  (TNS) — A two-month extension requested by Mount Airy #1 LLC has been granted by the Pennsylvania Gaming Control Board.Lawrence County Commissioner chairman Dan Vogler, who attended the gaming board's monthly meeting in Harrisburg on Wednesday, said board members unanimously approved the request that gives the casino operator until Oct. 12 to submit its application for a Category 4 mini-casino.He said no one from Mount Airy appeared to be in [...]

Source Business - poconorecord.com https://ift.tt/2LNMOv0

How To Start A Blog And Make Some Cash While Doing It

If you’re here to start a blog, congratulations!

Starting my first blog was one of the best decisions I ever made, and the people I’ve reached (not to mention the money I’ve made) are just a couple of the benefits I’ve experienced over the years.

Knowing where to begin with your first blog is challenging.

But, what if you don’t have a clue what a domain is, or how the heck a host works?

Even if you don’t have one iota of experience with content writing or starting a website, I promise you can do it.

With this guide, you will be crafting your first post about a topic you love, on a fully functioning website you own, in just one hour.

Ready?

Then read on, future blogger.

I’m going to walk you through everything you need to know to get your blog started and earning a side income.

Why You Should Start a Blog

If you’re like most of the others who come across this page, you’re here because you want to use a blog to help you earn a side income, or even become a passive income source.

Of course, there are more benefits to owning a blog than earning money.

Let’s take a closer look at what a blog allows you to do:

  • Get creative. Nothing gets your creative juices flowing like writing a blog post on a subject that intrigues you. As you write more content it will lead you to answer more questions inside your chosen niche. For many bloggers they find that they grow more creative with every post.
  • Have a voice. A blog lets you talk about what matters to you. Whether you’re a self-proclaimed political pundit, a passionate fashionista, or a financial advisor like me, move beyond the treacherous minefields of Facebook comment threads and say what you need to say in your own space. Be LOUD. Be quiet. Be formal. Don’t. The beauty of a blog is that it reflects your personality and your ideas, from the font to the pictures to the words on the page.
  • Do what you love. Creating a blog is one of the best ways to learn more about your hobbies, enjoy yourself, and pursue your passions, too. If not a single person read your blog (they will, promise!), you’d still be gaining so much in the self-fulfillment department as you learn for yourself and educate others.
  • Make connections. Everyone has a passion, and blogging has a unique way of connecting you with people who care about the same things you do. It adds your voice to a global conversation, with endless possibilities for advancing in your profession, making friends, and growing your blog’s reach.
  • Make a difference. One of my favorite parts of blogging is positively impacting people. People are looking for information and you are able to provide them with an honest opinion that can really make their lives better. Whether it’s unlocking a new hobby, simplifying their life, helping them get out of debt, or restoring a relationship, blogging truly helps you reach people. It’s such a rewarding experience to hear from a reader who’s benefited from content I wrote even years ago.
  • Make money. Generating a profit on your blog might be slow-going at first, but hang in there! With the right tools in hand, you can start making money with your posts through ads, sponsorships, and/or affiliates. No need to worry about exactly how those work just yet. Just know, in time, your site can be a major moneymaker if you do the right things over a long period of time.
  • Grow your business. Blogging doesn’t just profit you in the immediate sense. The longer you blog, the more connections you make, and the better your content gets, the more your street cred improves. You can establish yourself as an expert through blogging, get published, and further the success of your business.

Those are just a few of the benefits of starting a blog.

I could go on and on.

But let’s go ahead and get you started.

Choose your Niche

Don’t skip this step unless you are sure you’ve got a plan already laid out.

In just a moment, I’ll show you how to purchase a host and domain, but first you need to pick a subject area for your blog.

While your ideas can change down the road, you need a clear direction before you create your site so you can start building a strong brand and avoid abandoning your blog down the road.

You might see a blog that’s doing really well, with an abundance of hardcore followers, major monetization, and top Google rankings.

Does that mean you should automatically follow that writer’s lead and create a blog in the same niche?

Not necessarily.

You have to ask yourself a few questions before you get started.

And as you work your way down the list, you’ll probably see a clear topic for your blog emerge.

Get out a pen and some paper, and let’s dive in.

  1. What do you love?

Raise your hand if you chose a major or career you didn’t love based on salary or similar features.

Fake it till you make it might work in some fields, but personal blogging isn’t one of them, trust me.

You need to be certain the niche you choose to write in matters to you, or at least interests you.

Why?

  • Because it shows. When you genuinely love the subject you’re writing about, the passion will be evident in every word on the page. Conversely, write on a topic you have zero cares for and your content might suffer (and so will your readers).
  • Because passion drives motivation. You might be able to churn out some content on one of those topics, but don’t assume you’ll have the long-term motivation to sustain a thriving blog.
  • Because you’ll be researching it… a lot. I had an English teacher who always advised the class to carefully weigh their research topics against their interests.

Brainstorming, she would say, was the time to change your mind multiple times. Once you submitted your topic, though, you were married to it.

Do you love your blog topic enough to marry it, to dedicate hundreds or thousands of hours getting to know it?

If that mental image gave you major anxiety, you may want to reassess your blog idea.

It’s harder for some people than others to identify their passions, so here are a few questions to ask yourself if you’re still in the dark (but often times, the first few ideas which pop into your head are truest to your heart):

  • What high school or college classes pique(d) your interest?
  • Now turn to the media. What kinds of news stories interest you? Sports? Politics? Technology? Literature? Art?  Scroll through your search history or peek at the pages you follow on social media for more insight.
  • Look at your hobbies. What do you dedicate your time, resources, and energy to? Maybe you love antique shopping, hiking, or planning awesome vacations for your family. What you do for fun is a great focal point for what you write.
  • You know that one topic you’re always talking to your friends or family about, the one that both excites and interests you? Hint, that’s your passion. Pursue it!
  • What’s your job? If you are passionate about your profession, consider writing about it! You can offer both passion and expertise, which all of the best blogs do.
  • What’s your dream job? If you didn’t have any financial cares in the world, what would you be doing with your life? The answer to that question is a great place to start your blog.
  1. What Do You Know?

Experience goes hand-in-hand with your passion.

While you certainly won’t have all the answers starting out, it’s important to write on a subject you’re knowledgeable about.

Because I guarantee your top competitors will be.

Again, look at your career, your hobbies, and your life experience to choose a niche, and pick a topic you can provide your own unique insight to.

  1. How Specific Is Your Niche?

The pendulum swings both ways here, as there are pros and cons to writing for a really broad category of people as well as for a super-specific niche.

The key, once again, is research.

Did you know you can find out what people are searching for in your niche right now?

With a simple keyword search tool (which we’ll introduce you to later), you can pinpoint users’ top searches surrounding your subject area, which can help you decide the overall structure and content of your blog.

Maybe you’re a yoga instructor who wants to write solely about your art.

Instead of branding your site as one of many in the niche of health and wellness, make it a sub-niche exclusively targeting others who love yoga.

On the other hand, you could find yourself with a wealth of financial information (like me), and choose to build a blog around a variety of fiscal topics.

Remember the idea of marrying your topic. 10 years from now, will you be content solely posting in your niche?

If not, you may want to expand it a bit.

In addition to knowing how specific your subject area should be, you need to know your audience.

  • Who do you want to come to your site?
  • How will you pull them in?
  • What questions will they have that your blog answers?

Going in with a specific niche in mind will help you plan your content and design.

  1. Where’s the Money?

If your goal is just to express your thoughts and expertise, you may not care about monetizing your site; however, most bloggers have a desire to do both.

Who wouldn’t mind money coming in passively from content you posted long ago?

And, while your blog might not be an overnight moneymaker, you can create one as a side hustle which could grow to a full-time gig.

I did it, and I’ve written multiple posts to show you how you can make serious bank with your blog, too.

The fact of the matter is, some niches are more profitable than others.

There are some surefire strategies to make money in any niche, but if you’re seriously considering blogging as a business venture, you need to research it thoroughly to assess the level of competition in your niche and the potential for profit.

Here’s some pre-blog practice in creativity.

You’ve got that paper and pen handy, right?

Here’s what I want you to do…

First, jot down each of the blog categories you’re considering.

Got those down?

Now, for each of those categories, give yourself a set amount of time, maybe 3-5 minutes, and come up with as many blog post topics as you can.

I’m not saying the longest list of topics should automatically win here, but the subjects you were able to crank out lots of ideas for may be your best bets!

And the niche where you struggled to string two sentences together may need to go.

Now, Let’s Talk Blog Names!

Once you know your niche, you get to keep flexing those creative muscles and come up with a name for your blog.

While naming your blog might seem even more intimidating than choosing a subject, it doesn’t have to be.

Have fun with this step!

Here are few pointers to get you started.

Unless you’ve been sitting on a brilliantly creative and incredibly unique name for your blog since the idea to start one struck, you’re going to need some strategic planning here.

  • Do your research. Luckily, you did a lot of the work for this step when you researched your blog topic. When you choose a name, you need to think carefully about your niche and your target audience.
  • You want the name of your site to encompass how in depth your niche is. For example,  I give financial advice on a lot of topics. The name of my site reflects that.
  • You also need to scope out the competition. Which ones are thriving?  You can’t copy their actual names, but you can copy their techniques.
  • Do more formal and technical terms work better for your niche, or can you have some fun with your name?
  • Then, think about the content. What kinds of words do you associate with your site and the kind of info it will provide.
  • If you need a little help, try a keyword search. Tools like Google’s SERPS show you the top keywords users are searching in your market. Make note of them.
  • Be creative. In addition to the considerations above, think about your voice and brand.
  • What do you want your title to say about you and your blog? Do you want a catchy and intriguing title people have to click to understand? Or a straightforward one that will help establish you as a credible informational source?
  • Now take those keywords you jotted down and play around with them. If you have a hard time recalling synonyms on the fly, pick up a thesaurus and find some there.
  • Another great tool? Alliteration. Your moniker can be a monumental moneymaker. (See what I did there!?) If there’s any room for a play on words or slang that might appeal to your audience, add it to the list.
  • Another great go-to? Your name. Lots of authors focus their brand around their name, and it could be a great way to brand your blog and set you up as an authority.
  • Be practical. While it’s true witty, creative names are some of the biggest winners, remember what your goals are.
  • If you want to drive people to your site, be a top-ranking source in your niche and make money, your name needs to contribute to those goals.
  • Having a name that’s easy for new followers to type, search, and remember can go a long way.
  • And it helps to show some connection to your blog’s subject, especially if it’s a really specific sub-niche.
  • Search availability. We’ll get into domains in greater detail in a moment, but here’s the gist.
  • You know that frustration you run into when a site asks you to create a password then tells you the one you entered is already taken?

Or when Instagram rejects the handle you entered, because there are apparently more you’s out there than you realized.

Did you throw in the towel and decide Instagram wasn’t worth the trouble?

Of course not.

You soldiered on, tapped into that crazy creativity deep inside, and devised an awesome new name your followers love.

Same thing with the blogging world. There are literally hundreds of millions of blogs online today, and depending on how popular your niche is, the name game might be a competitive one.

With sites like GoDaddy, you can enter your name and see if it’s available. If not, go back to the drawing board, try some of the creative approaches above, and see what your alterations bring up.

Getting Your Site

You’ve done your homework and landed on the perfect niche that combines your passion, expertise, and profit potential.

And you have an idea for an available name.

Now what?

You’ll want to go ahead and start looking to see if it’s available.

HostGator, for example, has a nice little search feature. Check it out here.

Keep in mind while some offers might look appealing now, they may not be the best money in the long run.

And if you’re the prospective blogger I mentioned earlier who really has no idea what those terms even mean, no worries.

As promised, I’ve got you covered!

What’s a host?

First things first, let’s define what a host is.

You can build out an awesome website chock full of content, but in order for other people to be able to access it on the Internet, you need a host.

A hosting service basically books you space on a server, which is the place where websites are stored.

I like to compare hosts and servers to real estate. In the world of virtual real estate (the web), your host is the land you purchase to build your home (your website).

Whenever you type in a web address, let’s say GoodFinancialCents.com, you’re being connected to my server and shown my content, all because I have a host.

Make sense?

Good. Let’s move on to domains.

What’s a domain?

Here’s the simple breakdown:

As you now know, the host is the virtual location housing your site.

The website, then, is the blog itself.

The URL, on the other hand, is the address, i.e. the full web address you see in the search bar at the top of a site.

And the domain is just the name that follows the http:// portion of the URL.

People tend to get these terms confused, when they’re actually unique and pretty easy to understand.

Let’s plug those definitions into (hopefully) your favorite financial site.

Good Financial Cents is the website you’re perusing right now.

The URL is https://ift.tt/2ppyodo and the root domain is goodfinancialcents.com.

So, when I talk about choosing and purchasing your domain, I’m referring to your site’s name.

And just like your site’s space, you have to purchase the name before you can use it.

Types of Hosts

You might be itching to buy your domain first if it checked out in your domain name search, but I’m going to recommend you start with your host.

Here’s why.

A lot of hosting services out there offer you the opportunity to register your domain with them as well, sometimes for free, or otherwise offering domain promotions with your hosting registration.

And where and how you choose to host will play a bigger part in steering your site’s success than where you buy your domain will.

When it comes to hosting services, there are ultimately two types:

  • Free Hosted Platform
  • Self-Hosted Blog

Understanding the differences between the two is key.

Free Hosted Platforms

There are a ton of free services who will allow you to start your blog right away. They make it really easy to get going, but, ultimately, you lose a lot of control by going this direction.

This loss of control frequently includes:

  • Not being able to generate income from the blog on day one
  • Difficulty moving your content to another platform
  • Not having a domain that you own
  • Limited options for the design of your blog

In the long run you are going to be much happier if you start by spending a few dollars, a little extra time, and establish your blog up with the best foundation possible. That leads us to…

Self-Hosted Blogs

The main difference between hosted and self-hosted sites is a matter of real estate.

But there’s so much more to a self-hosted site than having your own server.

If you still aren’t convinced, here are even more pointed reasons you should self-host your blog:

  • You get your own domain (which looks more legit). Instead of owning a sub-domain on someone else’s site (example.blogspot.com), you truly own the domain you want to represent your brand (example.com).
  • You can customize everything. One of the best parts of a self-hosted blog is how it allows you to make your site your own. There are thousands upon thousands of themes to choose from (many of which are free), and far more functions and features to add to your site.
  • You make more money. Seriously. Not only can you customize the look and feel of your blog, but also optimize its performance. With a self-hosted site, you can place ads the way you want them, learn and implement SEO (search engine optimization) strategies, and make a bigger impression on Google.
  • You get more for your money. If you’re serious enough about blogging to buy a domain through your free blog host and pay for a theme, you’re far better off advancing to an affordable self-hosted site.

You can spend money on your externally hosted site all day, and you’ll still never come close to matching the functionality or results of a self-hosted site.

I’m all about purchases that make good financial sense, so this one is a no-brainer.

How To Set Up Your Self-Hosted Blog

Ready to get your site launched?

Here’s what you need to do:

Step 1: Choose your host

Most self-hosting bloggers choose to manage their sites through a third-party system like HostGator.

For a basic package, you could be spending around $3-$7 a month (which sometimes includes a free domain!) with a plethora of free themes and software installations at your disposal.

Step 2: Choose your plan

hostgator hosting plan

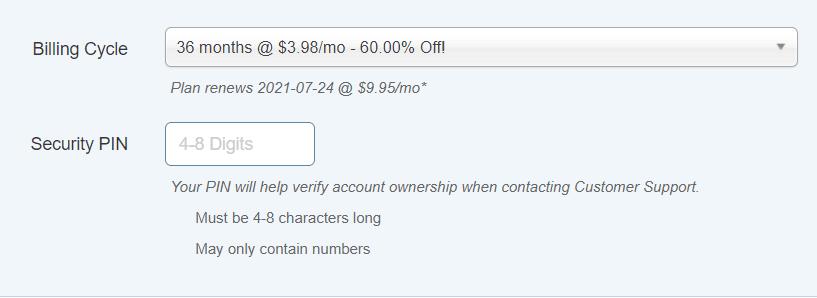
At this stage, you get to choose what features you want your site to have and you can add or remove features down the road.

Generally, a basic plan will offer you standard features and the tools you need to successfully start your new blog, and an upgraded package will offer you unlimited versions of those same features plus added security benefits.

Let’s take a look at some key features you’ll get with most popular hosting sites.

Websites

Most hosting sites offer you 1 website with their basic package. As you upgrade, you can host more sites.

For instance, Bluehost’s plus plan, which costs $2 more a month, allows you to host unlimited sites with your subscription. You may need to pay more for those additional domains, though.

Domain

As I said earlier, you should be able to obtain your domain from your hosting site. You usually get one domain with a basic package, sometimes more, if you upgrade.

You should also look to see if your hosting site offers any free parked or subdomains.

While your main domain is the key way users get to your site, these alternate domains account for slight differences in URLs, directing them all to your site.

Usually, you’ll pay around $9.99 a year to register a .com domain, which you then renew annually.

Bandwidth

Bandwidth has to do with your site’s speed, specifically how quickly data can be transferred over your internet connection.

If you have a site that’s saturated with multimedia, bandwidth matters.

The good news is that sites like Bluehost and HostGator offer unmetered bandwidth, meaning it should be substantial for all of your sites and you won’t be charged more based on how much you need.

Storage

Hosting sites usually measure your space in GBs, and you’ll notice that a lot of standard plans offer 50 GB.

Is that enough space for your site?

Chances are, yes.

Blogs don’t take up much digital storage, and the amount should be plenty to house your blog for quite some time.

SSL

Short for a Secure Sockets Layer, an SSL certificate safeguards you and your readers by guaranteeing the data between their browser and your server stays encrypted.

Do me a quick favor.

Look at the top of your address bar and you’ll find a little lock icon, followed by the term secure in this case.

Click the lock and you can see the site’s certificate and settings and learn more about how your information is being protected.

Platforms like Bluehost offer a shared SSL with their lower-end packages and a private SSL unique to your domain with upgraded packages.

If you’re planning to process people’s debit or credit card payments through your site, a private SSL is crucial.

Luckily, with HostGator, this is free:

hostgator ssl

Do note, however, a shared SSL might result in a pop-up security warning on your site.

Email

One of the most convenient benefits of a self-hosting site is email. Most platforms offer you a certain number of email accounts tied to your blogging business, often granting you unlimited emails with an upgraded account.

There also may be some limits to email storage, so make note of this as you shop around. In addition to the convenience they add, official email accounts linked to your blog work to build your brand and establish your professional credibility.

It’s a win on every level!

Email Management

If you pay a little extra for a premium account, you might encounter email management systems.

For example, Bluehost utilizes SpamExperts, a software which archives your messages and filters out spam for you.

It’s not necessary but convenient if you anticipate some major traffic in your blog’s inbox.

Dedicated IP

You may encounter the term dedicated IP as a feature of upgraded hosting plans.

What in the world is it and do you need it?

First, an IP address is used to pinpoint the actual location of your site.

With a shared IP address, your site is stored on a shared server.

On a private IP,  has its own unique address.

So how does that difference impact your blog?

For the most part, it shouldn’t. Much like an SSL certificate, a dedicated IP is primarily needed for a business handling commerce.

Marketing Credit

Host sites may offer you promotional advertising credit when you sign up. For instance, Bluehost offers credit for Google AdWords and other pay-per-click ad services.

Essentially, you create an ad with some carefully chosen keywords that Google features atop or beside people’s search results.

When people click those ads and enter your site, Google gets paid, hence the name pay per click.

If you choose a package which offers these promotions, you can use your sign-on credits as a starting point for marketing your blog.

There you have it.

Although some self-hosting sites offer more features and some offer fewer, you should have an ample amount of information to decide on a plan.

Weigh your blog’s needs, your expectations, and your budget to decide what kind of plan is best for your blogging venture.

Step 3: Choose Your Domain Name

hostgator domain name options

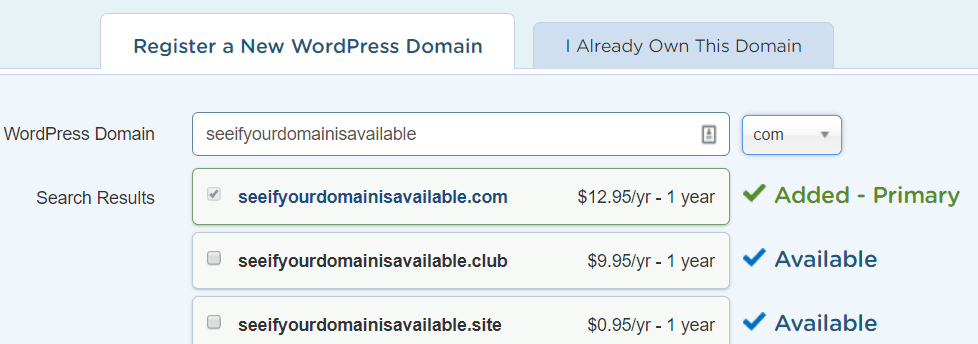
If you’ve followed the steps in this post, you should already have your domain name locked and loaded.

At some point in the registration process, you’ll be prompted to enter your domain name, which will either be accepted or rejected based on its availability.

If circumstances have changed in the time since you brainstormed your domain name and it’s no longer on the table, no need to worry!

That’s why you compiled a list of multiple options.

Plug in another and see if it’s available.

Continue the process until you land on one which doesn’t already exist.

Pro Tip: If you want to purchase additional parked domains with different extensions, more power to you. If you think you may build out an entire brand, definitely do it now.

But for the primary domain name, choose a .com extension.

Not only are they the most popular among bloggers and familiar to users, but they tend to do better business in terms of SEO (search engine optimization), which means more money and followers for you.

Step 4: Build your site

With a plan purchased and domain name registered, you’re ready to get started!

At this stage, you need to decide what type of software is going to meet your skills as a designer, your site budget, and your needs for the site.

There are quite a few options on the market for building your self-hosted blog, like WordPress.

Wait, back up.

Didn’t I discourage you from starting a WordPress blog earlier?

That statement needs a little clarification.

Understanding the Difference Between WordPress.com and WordPress.org

When people talk about using WordPress for their blogs, they could be referring to two different tools.

There’s the WordPress I referred to earlier, which is WordPress.com, a free hosting site.

And there’s WordPress.org, a site where you can download software to build your self-hosted blog.

So when I suggest you utilize WordPress to build your blog, I’m referring specifically to the site-building software, not the free host.

Choosing a Theme

While WordPress is by far the most popular choice among users, it’s one of several optimized for use with a self-hosting site.

On sites like Bluehost and HostGator, WordPress and other site builders are integrated into the platform.

wordpress themes for free

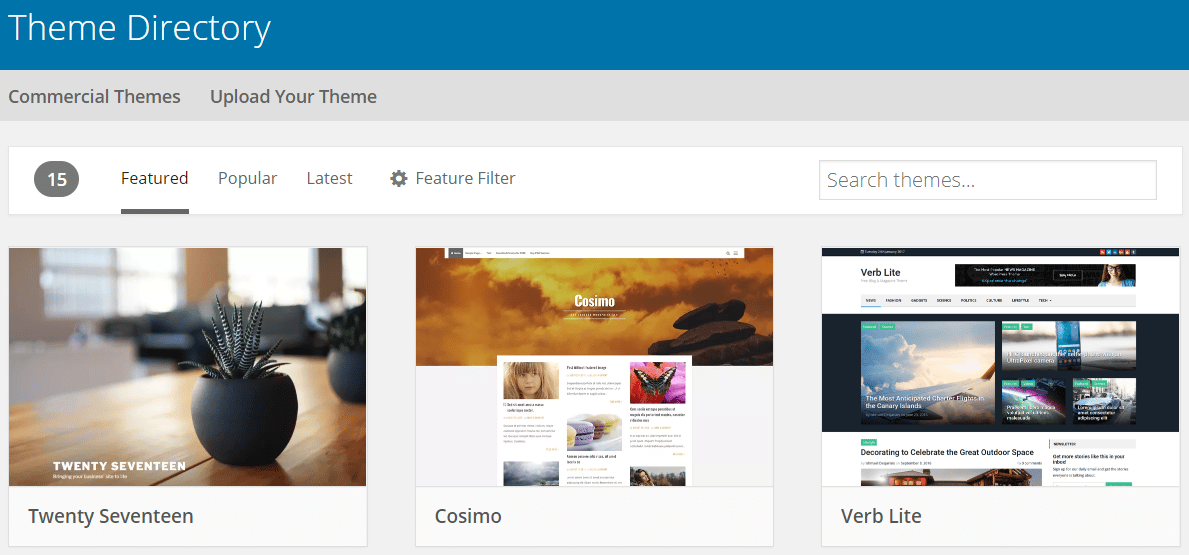
With one click, you could be working with WordPress through your hosting site to build out and edit your blog.

WordPress offers thousands of free themes in Bluehost, one of which could be perfect for your blog.

WordPress is appealing to both technically savvy bloggers who work to customize their sites on the back end and novices looking for clean, free templates to manage with ease.

Remember, you’ll get better at designing and navigating whatever software you choose as you spend more time with it.

And you can find a ton of resources online to help you learn how to build and customize your site.

(I highly recommend you choose to build your site on WordPress. The site you’re reading right now is!)

Free Vs Premium Themes

If you’d like to move beyond free themes, other theme shops offer thousands of templates available for purchase, some more technologically advanced than others.

The possibilities are endless, all depending on the look, feel, and functionality you want your site to possess.

Free templates can be a great starting point for your blog, but they may have some limitations.

Aside from being unique, premium templates usually offer features like additional color choices, more layout options, and shortcodes (which simplifies normally time-consuming and complex coding tasks).

Beyond the aesthetic of your site, you also want to consider how the site-building software functions.

Some tools are prime for users who want what’s known as a drag-and-drop interface where they can visually build their site from a user’s perspective, dragging and dropping content directly onto the page, exactly where they want it.

If you aren’t a designer but want a blog which really looks professionally built, you might want to check out all your options and even install a few to test them out before finalizing your decision.

Shop around, try out some templates, and get to work!

Bottom Line

Setting up your blog is not difficult.

You can add starting a blog to your mental list of tomorrow’s to-dos (never to be touched), or you can set aside 1 hour, right now, to make your dream a reality.

With a little creative brainstorming, research, and your new blogging terminology in hand, you can confidently launch your self-hosted blog today.

Write what you love, impact readers, and start making money today!

I promise you won’t regret it!

Next Steps

I’ve walked you through getting your blog up and running, so what’s next?

Once you’ve determined your niche, purchased your domain and host, and selected a theme, it’s time to start writing!

Here are the steps you need to take to get your blog off the ground and into the stratosphere of success.

Your First Pages

The first pages you want to have on your blog are going to be about your mission (the “home” page) and about you (an “about” page).

Your “home” page should be something which tells the user about what your site is for, and allows them to navigate the main topics of your blog.

The “about” page is a page specifically to talk directly to your audience, and tell them who you are. Build trust here, don’t “sell them” on your brand.

This makes it clear to the person coming for the first time what the site is all about and why you are the right person with the right answers.

Plan Your Content

When I first started my blog I wrote a big list of all the topics I thought would be great to help educate people on their finances.

It wasn’t nearly long enough, but it got me started and excited about my topic.

The one thing I learned over time was I needed to have a plan of where to take people once they reached my site.

So if the started on a retirement planning article, they would then have the option to read more relevant content.

Make sure your articles are taking people on a journey with you not just coming for info and leaving.

Build Your Brand

Congratulations! You are now an Internet sensation!

Your brand can always look bigger than you really are.

Just make sure to set up all the social media accounts to go with your brand and take the time to connect with people. People are amazingly loyal if you make them feel a part of your tribe.

Be Diligent

You may hit a hot topic, have it go viral, and be an overnight success, but more likely, you will build your following over time.

So keep at it! 

As Dave Ramsey once said, “It took us 15 years to become an overnight success.”

The great thing about the Internet is that things move faster than when Dave was building his following.

Happy Blogging!

The post How To Start A Blog And Make Some Cash While Doing It appeared first on Good Financial Cents.


Source Good Financial Cents https://ift.tt/2LkcTFG

This Guy Gets Paid to Swim With Sharks (It’s Not as Scary as It Sounds)

Six Basic Steps Toward Easy Meal Prep at Home

One of the most powerful pieces of advice that I have for people in terms of saving money is to get into the habit of preparing your own meals at home – and not those prepackaged meals, either. Restaurants are expensive. Takeout is expensive. Delivered food? Expensive. Prepackaged meals? Expensive. All of that stuff drains your wallet far faster than you might realize.

So, what’s the argument against cooking at home? Many meals require some degree of skill to make and although that skill level is often pretty low, it’s still present. There’s also the time issue and the energy issue and the equipment issue – each solvable, of course, but they again provide resistance against preparing food at home. Add up all of that resistance and many Americans find themselves calling Pizza Hut.

I’ve written about this challenge in the past. In particular, I offered up six simple steps for cooking at home if you’ve never really done it before:

Step #1 – Make Something Super Simple
Step #2 – Keep Dishes at a Minimum
Step #3 – Focus on Mastering Basic Food Preparation Skills
Step #4 – Acquire a Tiny Number of Tools You Trust
Step #5 – Start Branching Out With Variations of Trusted Meals
Step #6 – Treat Cookbooks and Food Magazines as Idea Machines, Not As Gospel

I’d also suggest checking out my minimalist kitchen gear, which covers the basics of what items you need to cook at home.

As good as those ideas are, they miss out on two counts.

First, none of those things really address the time and energy issue of the whole process of cooking. Figuring out what to eat and then cleaning up afterwards is often more effort than the actual cooking itself.

Second, none of these strategies really point you at specific things to do. While I provide some pointers in the details of those posts, the big bold points don’t tell you what you should and shouldn’t be doing. They’re just general things that are helpful in a broad sense bud don’t directly move you toward a short term goal that involves cooking or preparing an actual meal.

So, here are six basic things you can do to work towards effortless meal preparation at home.

Experiment When You’re Not Under a Time Crunch

The time to learn how to cook is not when you come home from a long day at work and feel absolutely exhausted, or when you are under an incredible time crunch and can’t afford anything going wrong. Often, people find themselves in these positions without any sort of cooking skills and thus cooking feels overwhelming or impossible. (Trust me, it’s easier to make something in those situations if you’re intimately familiar with your kitchen, but it’s much more difficult if you haven’t ever made much in the kitchen.)

My suggestion is to try things when you’re not under a time or energy crunch. Make things for the first time or two on the weekends, when you have time to do them at your own pace and there’s no major crisis if things don’t work out. Don’t put yourself under additional time pressure and don’t start from an already-tired state or else it will feel like misery.

Once you start feeling familiar with making things in the kitchen, it won’t feel nearly as overwhelming or impossible to make a meal after work, even under a time crunch.

Plan a Little

While it’s fun to imagine a home chef just throwing things together based on whatever’s in the cupboard, the truth is that it only really works if you have a lot of staples on hand, and if you’re reading this article, you probably don’t have a lot of staples on hand and also probably don’t have any ideas of how to use them.

That’s why, at first, it’s a really good idea to follow recipes carefully. They’re meant as instructions to follow at first; later on, your relationship with them might change into a source of inspiration, but not yet. Think of recipes as sheet music for a musician – someone just learning might need the sheet music for a very simple piece. Later on, an accomplished musician might be able to freestyle quite a bit and know a bunch of pieces by heart and only need sheet music for a really complex piece. Recipes are for home cooks like sheet music is for musicians.

A good recipe tells you what you need to have on hand right at the start, so plan ahead a little and make sure you have all of those things on hand. This will probably involve a trip to the grocery store, but it’s far better to do that before doing anything else.

Again, as you get more familiar with this, it’s a good idea to transition into weekly meal planning because it’s a huge money saver, but don’t sweat that yet when you’re just getting more comfortable with cooking at home.

Make a “Dump Meal”

This is about the easiest thing you can make at home. It basically just requires a slow cooker – it’s really the only kitchen implement you need for this. All you have to do is just put a small set of ingredients in there in the morning, turn it on low, and come home to a finished meal. Some of the ingredients might require a cutting board and a knife to chop up a vegetable or slice up a piece of meat, and you might need a can opener. It can’t get any easier than this – in fact, I find such meals to be less hassle than actually ordering food or going to a restaurant, and they’re cheaper, too.

My absolute favorite slow cooker “dump meal” is minestrone soup. The only thing I have to cut up is two carrots, which I slice into discs. Into my slow cooker, I put that sliced carrot, 1 cup of diced frozen onions, 3 cloves of minced garlic (I often buy minced garlic in large containers and keep it in the fridge, using just what I need for recipes), a large (28 ounce) can of diced tomatoes, two smaller (15 ounce) cans of cannellini beans, 3 cups of vegetable stock or broth, and 3 cups of water. All of that, right in the slow cooker in the morning. I turn it on low and forget about it.

About fifteen minutes before eating, I’ll add 8 ounces of uncooked pasta (I like to use elbow macaroni, but anything will do), a handful of asparagus spears if they’re in season, a cup of frozen peas, and some fresh spinach (a 6 ounce bag, if you’re buying it at the store). Stir it and put the lid back on. Add some salt and pepper to taste when it’s finished and have some grated cheese nearby to top it.

That’s literally all it takes. We’ll usually serve it with a simple salad made during that 15 minute gap – basically some type of lettuce or spinach tossed with a bit of salad dressing and whatever vegetables are in season, like onions or grape tomatoes. We might also bake some pre-made breadsticks from the bakery section of our local store.

This makes enough for our entire family at a cost of about $12, and usually leaves enough for a bowl of leftovers for Sarah to take to work for lunch the next day. That means we each eat for about $2.

Sometimes, I’ll double the whole recipe (shooting the cost up into the $20 range) and then save individual containers of the soup for a meal in a few days or else put those individual containers in the freezer.

What if you don’t like minestrone soup? Here are 40 more slow cooker dump recipes (all including meat) and 21 vegetarian slow cooker dump recipes. There’s almost nothing that’s easier to make at home than a slow cooker dump recipe, so I suggest starting with minestrone soup or one of these ideas.

Make Macaroni and Cheese

Almost everyone likes macaroni and cheese. It’s such a simple pleasant food that can be made incredibly straightforward to please children or can be fancied up to please almost any palate. It’s also one of the easiest things on earth to make, so I usually encourage people to make this as one of the first things they make in the kitchen. Each of my children – all of them pre-teen – have pulled this off with success.

I basically follow the three ingredient mac and cheese recipe from Serious Eats.

All you do is put six ounces of macaroni in a medium saucepan and add just enough cold water to cover the macaroni. Add a pinch of salt and bring it to a boil over high heat while stirring constantly. When it’s boiling, keep stirring for six minutes. The macaroni will absorb almost all of the water, and that’s okay.

Next, add one six ounce can of evaporated milk and then let it come to a boil while continuing to stir constantly. Then, add a cup of shredded cheese that melts well – cheddar, fontina, gruyere, or jack. I prefer gruyere, but it’s expensive; Monterey jack is probably my second favorite. Immediately drop the heat down to low and keep stirring constantly until it’s all melted and creamy – two minutes or so. It’s done. Put a bit of salt and pepper on top and eat. It’ll taste incredible – like restaurant-grade mac and cheese. You can jazz it up with things like breadcrumbs if you like.

The thing I like about this recipe is that it makes something that most people at least like, makes a pretty stellar version of it, and it’s comically easy. My youngest child was seven when he prepared this on his own with zero help. We use this exact recipe as a side dish for many meals, and it can be a task that you have a child take on while you’re cooking something else.

Make Scrambled Eggs

If you like to eat scrambled eggs at all, I strongly encourage you to learn how to make scrambled eggs. It’s an incredibly simple and flexible thing you can make for yourself or your family, it works with every meal, you can mix in almost anything savory, and it reheats well if you have extras.

Just crack a number of scrambled eggs in a bowl – however many you like – and beat them with a fork until they’re consistently yellow, a minute or two. Add a bit of salt and beat that in for a few seconds, then let the bowl sit.

Take a teaspoon of butter and put it in the middle of a skillet. Put it over medium heat and let the butter melt, then use a plastic spoon or a spatula to move the butter all over the skillet until the skillet is coated. Add the scrambled eggs and let them cook for a minute, then slowly pull that plastic spoon or spatula along the bottom of the skillet to pull up egg curds off of the skillet’s bottom. Do this over the entire bottom of the skillet, then repeat every thirty seconds until the eggs look like slightly wet version of the scrambled eggs you’d normally eat, then remove from the heat, wait a minute or so, and serve.

You can obviously mix lots of things into this recipe. Almost any savory vegetable works, as do most cooked meats and most cheeses. It all turns out delicious and with such little effort.

Handle Dirty Dishes the Smart Way

One of the big obstacles for many people in terms of cooking at home is dealing with the cleanup. If you eat at a restaurant, it’s done for you; if you get takeout or delivery, you can just toss the wrappers and other items. On the other hand, if you cook at home, you have to deal with all of that stuff.

A dishwasher makes it much easier, but even then, there’s some extra work involved. Also, many apartments and some homes (like my parents’ home) don’t have a dishwasher and don’t have space for one.

So, how do you solve this conundrum? Here are a few strategies I know from having lived most of my life in places with a kitchen too small for a dishwasher.

Have good tools. Have a strong scrubbing brush and a dish rag at your sink, along with good soap at hand. If you don’t have those things, it’s going to take far longer to wash dishes.

If you have a two bin sink, keep one sink full of water with a bit of soap in it. Just block the drain, fill it perhaps a quarter full with hot water, and add a bit of soap. Then, put your dishes right in that soapy water throughout the day, perhaps adding a bit more hot water once in a while. Just let the dishes soak. It’ll make it much easier to wash them when the time comes, and the other sink bin will be free.

If you have a one bin sink, get a large plastic bin, put it beside the sink, and keep your dirty dishes in there. This keeps the sink free of dishes so that you can easily start in with cleaning whenever you’re ready. Just toss dirty dishes in the bin for the moment, then wash everything in the bin at once when you’re ready. Since the sink is empty, you can dive right in. If the bin is watertight, you can put a bit of hot soapy water in there to soak some of the dishes, as noted above.

If something has caked-on grease or food pieces, pour a bit of vinegar, a bit of baking soda, and a bit of soap in it and fill it with hot water and let it sit for a long time, like a day. After that, it becomes really easy to wash. This takes care of basically every nasty caked-on grease problem I’ve ever faced.

Wash things in “streak order.” What do I mean by “streak order”? Start with stuff that will show streaks easily – glass items – then move onto silverware, then plates and plastic items, then pots and pans.

Have a drying rack beside your sink to put dishes in to dry, plus a ton of drying towels. Most things can air dry relatively quickly once rinsed, but a drying towel is great if you need something dry immediately. You can get a simple dish drying rack at most kitchen supply stores, and flour sack towels are great for drying dishes, as are leftover t-shirts.

Buy dish soap in bulk, then have a pump to dispense it. You don’t really want a bulk bottle of dish soap at your sink because it’s heavy and it takes up lots of space and when you pour it, it dispenses large amounts of soap. However, bulk soap is cheap. The solution is to get a cheap soap pump and fill it with bulk-purchased dish soap so you can use the soap one pump at a time. This cuts the cost of liquid dish soap down to almost nothing.

These tactics, in concert, make hand washing dishes into a pretty easy task, even if you don’t have a dishwasher. My parents have lived in the same house for 40-plus years without a dishwasher and use most of these tactics because they simply work.

Final Thoughts

If you can handle the things above, you’re already well on your way to cooking a wide variety of things at home. Move on to trying other simple dishes – pasta, for example, is incredibly simple – and try variations on the things you already know, like adding tarragon to the scrambled eggs.

Eventually, what will happen is that the repeated tasks begin to seem easy, the dishes you cook regularly begin to turn out consistently well, and you start trying out new things and new variations.

It’s at that point that you’re at the sweet spot that a home cook should enjoy, where preparing a meal doesn’t seem overwhelming and throwing something together in fifteen minutes seems like a fun challenge rather than an impossibility. At that point, the time and energy advantages of eating out almost completely disappear and you find yourself eating at home much more often and saving a ton of money doing it.

Good luck!

The post Six Basic Steps Toward Easy Meal Prep at Home appeared first on The Simple Dollar.


Source The Simple Dollar https://ift.tt/2uKJEBH

Best Places To Open A Roth IRA

Or, see our summary of the best Roth IRA providers 〉

Do you know what your income tax rate will be in the future?

The answer to that question will determine whether an investment in a traditional or Roth IRA is best.

If you think your tax rate will be lower in the future then it makes sense to avoid paying tax now through a tax-deferred investment vehicle like a Traditional IRA.

You enjoy a tax deduction today, boosting your monthly cash flow, helping your money grow more efficiently over time.

The downside to a Traditional IRA, though, is that when you withdraw the money, you will pay taxes on it as though it is regular income.

Plus, when you reach a certain age, you will be required to take minimum distributions.

Depending on your situation, your withdrawals from a Traditional IRA could cause greater financial difficulties than you thought — and Uncle Sam might get a bigger cut than you’d expected.

Opening a Roth IRA: Where to Invest

Popular investment firms that offer the best Roth IRA accounts of 2017 - so that you can confidently save for retirement

One of the great things about a Roth IRA is the fact that you can open one with virtually any reputable broker. You also have a great deal of flexibility in terms of the assets you can hold in a Roth IRA.

While there are some who hold precious metals, real estate, and even certain businesses in their Roth accounts, most consumers are better off using an approach that focuses on stock and bond index funds or ETFs. These assets are low-cost, easy to understand, and don’t come with a bunch of red tape.

Most online brokers will help you open a Roth IRA, and many of them offer low-cost fund choices. Additionally, many of them waive transaction fees when you sign up for an automatic investing plan and make monthly contributions, learn more about Roth IRA rules and contribution limits.

There is no shortage of discount brokerage firms that will let you open a Roth IRA with them. For most investors, the number of mutual funds or crazy ETFs you have access to really doesn’t matter. A basic, properly diversified portfolio can be constructed with any of the discount brokerage firms. This makes the main point of emphasis fees and transaction costs.

Ally Invest – Top All Around Roth IRA

Trade King was recently bought by Ally, and their services have been repackaged as Ally Invest. They’re lesser known than some of the big guys listed below, but the quality of their investment offerings and their top rated customer service make me highly recommend this deep-discount broker.

Ally Invest is online only, but their browser-based tools are intuitive and allow you to easily research your investments with customizable charting and real-time data.

What’s more, Ally Invest has absolutely one of the lowest stock trade commissions around at just $4.95 per stock trade or ETF trade. If you are looking to trade a lot within your Roth IRA, look no further. Mutual fund commissions are extremely low as well at just $9.95 per no load mutual fund trade. Additionally, Ally Invest has a collection of no-fee funds that you can choose from – although you still need to pay the expense ratio.

Betterment – Best Roth IRA for Hands Off Investing

In recent years, Betterment has made a splash in the world of investing. If you are a hands-off investor who wants to grow retirement wealth over time, Betterment might be the right choice for you. 

Betterment is a different kind of brokerage firm aimed at those who don’t want to make decisions on specific mutual funds or ETFs. Betterment creates a portfolio for you based on your risk profile, using only stock and bond ETFs. You answer questions about your risk profile, and Betterment does the rest. You do need to sign up for automatic investing and commit to $100 per month in order to use Betterment.

Betterment also offers the ability to automatically contribute the maximum each year. Betterment will figure out how much you need to contribute each month to hit the maximum, and if the IRS raises the contribution limit, Betterment will automatically adjust your monthly contribution to match. This isn’t required, though, so if you can only start with $100 a month, that’s your choice.

Betterment charges a percentage-based fee on the total amount you have invested with the firm, ranging between 0.15% to 0.35% each year. The higher your account balance, the lower your fee. It’s a great choice for beginner investors because the percentage-based fee system can work out to be cheaper for smaller accounts than the flat rate fees of the other guys. As your account grows, you might want to move your money, but for the beginner, Betterment is an amazing choice. For more info, here is my full Betterment review.

Lending Club – Best Non-Stock Investments

Lending Club is the top peer to peer lender in the United States. Unlike the other brokerages on this post, Lending Club allows you to invest in loans that are made to other people. So, instead of investing through the bank, you get to be the bank.

The company has been around for more than 8 years and has funded over $16 billion in loans. I am personally getting just under 9% return on my investments in Lending Club and have been VERY happy with the results. Read more about that in my full Lending Club review

You may be wondering, “Why the fees?”

The way Lending Club does a Roth is to partner with another company that sets up a self-directed Roth IRA. This allows you to direct your investments and not be limited to just stocks. These accounts require a little maintenance and that is a pretty standard annual fee if you only have a small balance in the account.

TD Ameritrade

Another brokerage firm that mixes online discount trades with brick-and-mortar locations is TD Ameritrade. This brokerage has more than 125 locations around the country that you can walk into whenever you have a question you want to be answered in person. However, the online trading platform is easy to use, and you are likely to accomplish just about anything you want without assistance.

Trade costs are competitive on the stock and ETF side, with a cost of $6.95. It’s also worth noting that TD Ameritrade has a collection of commission-free ETFs. If you are trying to build a long-term retirement portfolio, using these ETFs can lower your costs, even though you will still have to pay the expense ratios.

You do need to watch out for the mutual fund charge of $49.99 per trade, however. That can be a real problem and erode the effectiveness of your portfolio. As I’ve stated in my full TD Ameritrade review, I love everything else about TD Ameritrade except the $49.99 no-load mutual fund commission. That is simply too high.

If you are going to build an ETF portfolio, I can still recommend the company as a solid option thanks to the competitive commissions on ETF and stock trades, as well as the option for in-person help.

E*TRADE

When you think of online trading, E*TRADE is probably the company that comes to mind first.

The company has been around since 1992 and has constantly been pushing the industry to innovate trading technologies for customers.

Technically E*TRADE does have brick-and-mortar locations for you to go to, but there are only 30 in the entire country. E*TRADE is primarily an online discount brokerage firm, and they are an industry leader in this space.

E*TRADE offers a comprehensive suite of professional-grade trading platforms, allowing you to access accounts and market information from your desktop or phone – or even your Apple Watch©.

In trade for their awesome tools, E*TRADE’s fees are slightly higher than some of the other discount firms listed below. But here’s the trick to E*TRADE: there are more than 1,000 mutual funds available that come with no load and no transaction fee. Adding these to your Roth IRA will lower your fees. And then you get the best of both worlds; although you will still be responsible for the expense ratio charged on the fund. Check out my full E*Trade review for more information. 

OptionsHouse

OptionsHouse is another great broker in the Roth IRA space. Don’t let the name deceive you: OptionsHouse does give you the ability to trade options, but it isn’t an options-only broker.

They have incredibly inexpensive trades at $4.95 per stock or ETF trade. Mutual funds aren’t as inexpensive, costing around $20.00 per trade. Learn more in my full OptionsHouse review

Aside from the low trading prices, you can also make quick trades. OptionsHouse allows you to add options one the home screen. All you have to do is type the stock in, and then make one click.

Motif Investing

Motif Investing offers another unique way to invest your money and instantly diversify your portfolio without spending hours researching companies.

Instead of having to buy stock in several different companies, with Motif Investing you can buy one “Motif” which has 30 different stocks in it. All of the stocks inside of the motif revolve around the same industry.

The best part about Motif Investing is the ability to buy a motif portfolio that has 30 stocks or ETFs with one simple trade for $9.95. You won’t be able to beat those trading fees anywhere. See my full Motif Investing review for more. 

Firstrade

The benefits of Firstrade are obvious: low fees. But that isn’t the only thing that the discount brokerage offers to investors.

Thanks to Morningstar, Firstrade gives you plenty of information and research about stocks, EFTs, and mutual funds. On top of that, Firstrade offers a well-designed site that is simple to navigate, making it easy even for those who have never invested online.

If you’re looking for a brokerage that gives you flat fees of less than $5 – or $10 for mutual funds – while also providing plenty of tools, Firstrade is the place to go. More thoughts are available on my full Firstrade review

Firstrade is not the fanciest and won’t have all the bells and whistles, but they get the job done, and they do it without all of the massive fees.

Firstrade has a couple of promotions. The more money you deposit in your account, the more you’ll earn in cash and free trades.

USAA – Best Roth IRA for Military and their Families

USAA provides a variety of services and accounts for military personnel and their families. If you or one of your family members has ever been a part of any military service, you should be able to open an account with USAA.

While USAA’s trading fees might be a little higher than other options, they offer just about any insurance or financial product you will need. As a result, USAA offers the ability to have all of your accounts and policies bundled with a single company. Moreover, if you have the premium account, you will have a lot of fees waived, and your trading fees will be even lower.

As an investor or account holder, you should have no worries about the financial stability of the company. They have been in business since 1922, making them an excellent resource for any active military, retired military, or family members.

Scottrade

Scottrade is an online and brick-and-mortar discount brokerage firm, which is one of the reasons why I like it so much.

Not only do you get relatively inexpensive trading costs, but if you ever want to sit down with a live human being, you can at one of Scottrade’s 500+ branches around the country.

The firm has kept their trade costs steady at $7 per stock and ETF trade for years. Mutual fund trades vary based on the type of fund with a maximum trade commission of $17. If you construct a Roth IRA based on ETFs, you can get the lowest possible transaction fee. Read more in my full Scottrade review

Looking for tools to help you invest? Scottrade has what you need.

They have plenty of data, indicators, and real-time streaming quotes. They want all of their investors to have the info they need.

Charles Schwab

Charles Schwab is an interesting company that is really a full-service brokerage that is trying to play in the discount brokerage space. For stock and ETF trades, it does this well with an $8.95 commission on those trades.

But if you thought TD Ameritrade’s $49.99 mutual fund commission was high…Schwab charges $76. That is unbelievable. Only open a Roth IRA with Schwab if you plan to build a portfolio of ETFs, not mutual funds.

If you are looking for invest/customer support, Charles Schwab should be your go-to. Not only do they have 24-hour phone support, but you can also chat with agents and customer service representatives.

If you live close to one of their branches, you can go to their complimentary workshops.

Alternative: Skip the middleman and invest directly with a top mutual fund company

Discount brokers and full-service brokers charge fees on every trade into a stock, ETF, bond, or mutual fund. These brokers will tout no-fee mutual funds (also called no-transaction fee mutual funds) to show that they aren’t out to make a buck on every transaction you have for retirement.

But the number of no-fee funds offered is drastically different than the advertised number of mutual funds that attracted you to the broker in the first place. (Also, don’t get confused between no-transaction fee and no-load mutual funds. No-load funds mean there is no sales load cost as a percentage of assets on your investment; no transaction-fee means there is no fee to trade in and out of the mutual fund. No-load funds can have transaction fees, and vice versa.)

The easiest way to avoid unnecessary fees on your mutual funds is to simply cut out the middleman. You don’t need 10,000 different mutual funds, nor do you need to pay for every transaction you have to buy or sell into those funds. A well constructed portfolio of low cost index funds can offer you the best returns at the lowest cost.

Cutting out the brokerage middleman means going directly to the source: the mutual fund companies themselves. Not every mutual fund company will let you open a Roth IRA with them, but some of the largest will. Vanguard, T. Rowe Price, and Fidelity let individuals open Roth IRAs and deal directly with the companies to build their nest eggs.

Vanguard

Vanguard has long been an industry leader in low cost investments and the online account access is easy to navigate. The expense ratios on some of their index mutual funds are absolutely unbeatable.

Fees are clear to understand with Vanguard; we had to use the search function on the T Rowe Price website to discover the fee structure. Vanguard has an easily found link under the IRA portion of the website. Plus, we like Vanguard because the company is a non-profit dedicated to low investment fees.

  • Fees for Roth IRA: $0 (with electronic statements and confirmations; otherwise $20)
  • Minimum Required Investment: $1,000 for “starter” mutual funds, most other funds $3,000
  • Minimum Subsequent Investment: Varies, usually between $100 and $1,000 (electronic transactions only have a $1 minimum)
  • Commissions: If you invest in Vanguard mutual funds only, $0. Commissions vary for mutual funds outside of Vanguard or for ETFs.
T. Rowe Price

T. Rowe Price is another industry leader that offers mutual funds directly or through a broker. Expense ratios for index funds with T. Rowe Price are very competitive with the industry meaning you will get the maximum growth out of your invested dollars.

The company has a great Roth IRA page that explains everything you need to know about your eligibility to invest in a Roth IRA. The fee structure is mostly clear, although to find the full fee prospectus I had to do a search on their website.

  • Fees for Roth IRA: $0 (with electronic statements and confirmations; otherwise $20 if your balance is less than $10,000)
  • Minimum Required Investment: $1,000
  • Minimum Subsequent Investment: $100
  • Commissions: If you invest in T. Rowe Price mutual funds only, $0. Commissions vary for mutual funds outside of T. Rowe Price or for ETFs.
Fidelity

Fidelity is another massive mutual fund company that offers its funds directly to investors and through brokerage firms. Of the three mutual fund companies, Fidelity has the highest minimum required investment for you to get started at $2,500. On the flip side, there is no minimum additional contributions after that.

Fidelity has been battling with Vanguard and T. Rowe Price on expense ratio costs meaning you will be getting very competitive expense ratios.

  • Fees for Roth IRA: $0 for IRAs
  • Minimum Required Investment: $0 (although most Fidelity mutual funds have a $2,500 investment minimum)
  • Minimum Subsequent Investment: $0 for Fidelity mutual funds
  • Commissions: If you invest in Fidelity mutual funds only, $0. Commissions vary for mutual funds outside of Fidelity or for ETFs.

Who Qualifies for a Roth IRA?

It’s important to establish that you qualify for a Roth IRA. The basic eligibility requirements for a Roth IRA include:

  • You need to have earned income. If you are a stay-at-home partner, your spouse can make contributions to your Roth IRA. It’s also possible for minors to contribute to custodial Roth IRAs if they earn money from a job.
  • You need to meet income requirements, based on your tax filing status. The IRS evaluates these requirements each year and can make changes based on inflation. Check with the current-year requirements or with a financial professional to see if you qualify.

As of 2016, you can contribute up to $5,500 to your Roth IRA each year. If you are age 50 or older, you can make an additional “catch up” contribution of $1,000 per year. The contribution limit changes, though, so it might rise in future years.

It’s also possible to convert a Traditional IRA to a Roth account, or to rollover a 401(k) into a Roth IRA. However, there are tax consequences associated with this decision. You will have to pay taxes on the amount you convert or rollover today, and that can mean a hefty tax bill. Consult with a financial professional before you make this type of conversion.

Building the Roth IRA Habit

Having trouble getting into the habit of sending money in to your Roth IRA? You’re not alone. All of the above companies provide some sort of automatic investment option. You simply tell the firm how much you want to invest, on what schedule, and in what investment and the rest happens automatically.

Automatic investing is one of the best ways to build your Roth IRA without having to think about building your Roth IRA.

How to Manage Multiple Investment Accounts

Of course, you may have investment accounts, Roth IRAs, and Traditional IRAs across several different companies. You have multiple logins to remember to check up on your investments, and having some understanding of your asset allocation is not easy.

Enter Personal Capital. The company aims to solve the problems of managing multiple accounts, tracking your asset allocation, watching the performance of your investments, and in general helping, you keep all of your financial tasks in order. With a slick web interface and mobile apps that work on iOS and Android, you can see everything together in one well-designed space. On top of that, Personal Capital offers a fee analysis to help you reduce what you pay.

The best part about Personal Capital? The software is 100% free.

Will tax rates really be lower later on?

With a mounting national debt, many people believe personal income tax rates will eventually be forced to increase. So, even if you think that you will have a lower income during retirement, you might still be in a higher tax bracket or have other tax considerations impacting your finances.

Even if the national debt issue is somehow solved, the government doesn’t tend to lower a tax once it is set.

If you think that tax rates are going to go up by the time you retire, the best retirement account for you to open if you qualify for it is the Roth IRA.

With a Roth IRA, you make your contributions with after-tax dollars. This means you pay your taxes on the money now. While it might mean a little less today, it can make a big difference in the future. This is because your money grows tax-free. When you withdraw from your account, it doesn’t register as income, so it doesn’t change your tax bracket or tax liability.

A Roth IRA can be especially beneficial to you if you are just starting your first job. Chances are that you won’t make very much. Your tax liability might be fairly low anyway, so paying taxes on your low income isn’t likely to be a huge burden to you today. Plus, you have even more time on your side to let compound interest work its magic on your behalf.

There is no reason to put off investing for retirement. Open a Roth IRA today with one of the best brokers. It’s easy, inexpensive, and your future self with thank you.

How to Open a Roth IRA

how to open a roth ira
  1. Make sure you qualify to start a Roth IRA under the Individual Retirement Agreement tax law of the United States.
  2. Pick which brokerage meets your needs for starting a Roth from the list below (ex. TD Ameritrade is best for ETF investors and Vanguard mutual funds and for beginners).
  3. Go through the process of opening an account with that brokerage
  4. Set up funding for your account with your bank (large banks like Bank of America and Wells Fargo work best).
  5. Transfer money from you bank account to your Roth IRA
  6. Pick your investments and fund them with the money in your Roth account.
  7. Repeat Steps five and six up to $5,500 a year or $6,500 a year if you are over 50.

Summary: What are the Best Roth IRA account providers in 2018?

Broker Good For Commissions & Fees Account Minimum Start Investing
E*Trade Logo Overall
  • $6.95 per trade
  • $19.99 mutual fund
  • $0 set up
  • $0 annual
$0
Betterment Logo Beginners Hands Off
  • $0 per trade
  • $0 mutual fund
  • $0 set up
  • 0.15%-0.35% account balance annually
$100/mo
Lending Club Logo Non-Stock
  • N/A per trade
  • N/A mutual fund
  • $100 set up (< $5,000)
  • $100 annual (< $10,000)
$0
Ally Invest Logo Overall
  • $4.95 per trade
  • $9.95 mutual fund
  • $0 set up
  • $0 annual
$0
TD Ameritrade Logo ETF Trading
  • $9.99 per trade
  • $49.99 mutual fund
  • $0 set up
  • $0 annual
$0
OptionsHouse Logo Active Traders
  • $4.95 per trade
  • $20 mutual fund
  • $0 set up
  • $0 annual
$1,000
Motif Investing Logo Active Traders
  • $4.95 per trade
  • $17 mutual fund
  • $0 set up
  • $0 annual
$300
Firstrade Logo
  • $6.95 per trade
  • $9.95 mutual fund
  • $0 set up
  • $0 annual
$0
USAA Logo Military
  • $8.95 per trade
  • $45 mutual fund
  • $0 set up
  • $0 annual
$50
Scottrade Logo
  • $7 per trade
  • $17 mutual fund
  • $0 set up
  • $0 annual
$500
Charles Schwab Logo
  • $4.95 per trade
  • $76 mutual fund
  • $0 set up
  • $0 annual
$1,000
Vanguard Logo Low Cost
  • $0 for Vanguard funds
  • $0 annual
Varies
T. Rowe Price Logo Low Cost
  • $0 for T. Rowe Price funds
  • $0 annual
$1,000
Fidelity Logo Low Cost
  • $0 for Fidelity funds
  • $0 annual
$0
Share Good Financial Cents' reviews of the best Roth IRA companies
Other Articles That May Interest You

The post Best Places To Open A Roth IRA appeared first on Good Financial Cents.


Source Good Financial Cents https://ift.tt/2pDimHX