Did you receive a letter from the IRS? Take a deep breath, resist the urge to panic, and follow these tips to help you get past your initial shock.
Source CBNNews.com https://ift.tt/2HMS6HN

الأربعاء، 20 مارس 2019
Protect Yourself From Medical Identity Theft: Keep Your Health Information Private
Medical identity theft is an increasing concern for Americans. Follow these steps to protect your medical identity.
Source CBNNews.com https://ift.tt/2TP9inb
Source CBNNews.com https://ift.tt/2TP9inb
Federal Reserve Foresees No Interest Rate Hikes in 2019
The Federal Reserve left its key interest rate unchanged Wednesday and projected no rate hikes in 2019, reflecting a dimmer view of the economy as growth weakens in the United States and abroad.
Source CBNNews.com https://ift.tt/2FgY68V
Source CBNNews.com https://ift.tt/2FgY68V
Create a Website
Creating a website is overwhelming. Don’t worry, that’s completely natural when building your first website.
When we built our first sites, it was so complicated. And so many articles and YouTube videos on how to create a website made it seem a lot easier than it ended up being.
We’ve outlined all the specific steps below on how to create your own website. We included everything that we learned over the years from building hundreds of sites.
We’re here to help.
This page is a collection of 70+ guides.You won’t need to read them all in order to build your website. Browse through and read what’s relevant to your situation. This will save you countless hours of frustration.
Our General Take on Building A Website
Don’t get confused by all of the different options for creating a website.
WordPress is King
In most cases, we highly recommend to build your website with WordPress. It’s an open source platform that allows you to run your website with very little technical expertise.
Some of the biggest websites on the Internet are built on WordPress. TechCrunch, The New Yorker, Variety and MTV News, just to name a few.
It’s also the most popular blogging platform, so there are hundreds of thousands of smaller websites that use WordPress.
WordPress is used by 33.4% of all the websites, and has a content management system market share of 60.3%.
Much of our content is centered around WordPress because we use it for all of our websites outside of Ecommerce.
Here’s the guide on how to create your website on WordPress.
Shopify for Ecommerce
For Ecommerce, we like Shopify — which is an Ecommerce website builder that allows you to get an online store up and running quickly.
The reality is that creating and running an online store can be a huge pain. Shopify takes that pain away. That’s probably why they are growing so quickly, and so many great online stores are popping up on the platform.
Here’s the guide on how to create your website on Shopify.
The Dozens of Other Options
If you’re reading this right now, then you most definitely fall into the category of someone that should be using WordPress or Shopify.
In rare cases, it might make sense to create a website using Wix or a similar website builder.
In other (very) rare cases, it might make sense to have a custom built website.
How to Create a Website
Start with our guide on how to create a website in 120 minutes. Along with that, there are a number of useful guides to consider as you start working on your website.
How to Plan Out Your New Website
How to Buy The RIGHT Domain Name – A Detailed Guide
How to Develop Your First Brand Identity on a Budget
10 Trending 2019 Website Color Schemes
9 Places To Get Website Images (Paid and Free)
The Best Website Fonts That Go Together in 2019
13 Website Design Best Practices
7 Reasons Why You Do NOT Need to Hire a Website Designer
The 22 Key Elements of a High Quality Website
How Much Copy Should You Write on Your Homepage?
10 Contact Page Techniques That Make People Contact You
How To Create an About Page That Matters
How to Make a Wix Website in 6 Easy Steps
Some useful guides for optimization as your site gets up and running:
5 Easy Steps to Creating a Sitemap For a Website
Should You Switch Your Site to HTTPS? Pros and Cons
The Top 10 Principles That Boost Your Website Loading Time
Web Hosting
You need a web hosting provider in order to have a website.
We recommend SiteGround for most people. For advanced WordPress users, with high traffic websites, it could make sense to move to WP Engine at some point.
More about The Best Web Hosting Companies here.
Here are some additional guides to help you learn more about web hosting:
Everything You Need To Know About Web Hosting
The Best Web Hosting for Small Business
The Best Web Hosting for WordPress
The Hidden Costs of Website Hosting
Analytics and Reporting
An analytics tool is important if you want to know what’s happening on your website. It tells you how much traffic you’re getting, where it’s coming from, and what people do on your site. Google Analytics is the standard. That’s what we use for Quick Sprout.
Read more about why Google Analytics is the best.
Installing Google Analytics is easy. Consuming the reports is a bit more complicated.
Here are some guides to help:
The 2 Website Analytics Tools Pros Actually Use in 2019
Setup Google Analytics in 3 Steps – The Beginner’s Guide
10 Vital Customizations to Make in Google Analytics
A Guide to Google Analytics Add-on for Google Sheets
How to Track Your Leads with UTM Parameters
Building and Optimizing With WordPress
A WordPress website is basically made from what’s called a WordPress Theme and WordPress Plugins. All of the features of your website will come either from the theme or the plugins you install.
To help you get started, we reviewed all of the best WordPress Plugins across the most popular categories.
Here’s an in-depth review for each category:
Best SEO Plugins for WordPress
Best WordPress Security Plugin
Best WordPress Calendar Plugin
Best Google Analytics Plugins for WordPress
Best WordPress Directory Plugin
Best Membership Plugins for WordPress
Best Social Media WordPress Plugin
Ecommerce Websites
If the primary purpose of your website is to sell products, you’ll need an ecommerce website. We recommend keeping it simple and going with Shopify.
Read our full review on Shopify to see why.
Check out our review of the Best Ecommerce Platforms, to get a comparison to the other options out there.
Get the step-by-step on how to start an online store.
Our guide on how to create an Ecommerce website.
More useful guides on building an Ecommerce website:
How to Transfer Your Website to Shopify
Best Ecommerce WordPress Themes
Best Ecommerce Website Builder
How to Create a Trust Seal On Checkout Page
Starting a Blog
When you really break it down — most websites are blogs, and blogs are websites. They have become one and the same. The most popular blogging platform is WordPress, and that is also the same platform we use for any other website, blog or otherwise.
If you’re thinking about starting a blog specifically, and that is why you’re trying to figure out how to create a website…we have over 40 guides on blogging.
Here are the blogging guides specific to getting started, and building your blog:
Best Blogging Platforms / Blog Sites
Best WordPress Themes for Blogs
11 Things I Wish I Knew Before I Started My First Blog
The Top 12 Tips for Running a Successful Video Blog
10 Lessons Seth Godin Can Teach You About Blogging
100 Lessons Learned from 10 Years of Blogging
Creating Your Own Website: In Summary
Creating your website might seem overwhelming at first. It really comes down to starting with these simple steps:
- Is your primary purpose to sell things on your website? If yes, then focus on Shopify, if no, then focus on WordPress.
- Use the guides on Quick Sprout to help you through the process. It’s a learning curve for sure. Taking the time to set up everything correctly will help you grow your business and your traffic much faster later on.
- Don’t hesitate to reach out to us directly via email with questions. We’ll help however we can.
Source Quick Sprout https://ift.tt/2CxUIWB
The Complete Guide to a Mobile Friendly Website
Your website must be optimized for mobile devices. Why?
Well, for starters, 80% of the top websites according to the Alexa rankings were optimized for mobile users. Plus, 80% of all Internet users have smartphones.
It’s easy for people to browse the Internet from their mobile devices. Doesn’t it seem like everyone is glued to their smartphones all the time?
Even those who aren’t holding their phones right now, I’m sure, have them within arm’s reach, either in their pockets, purses, or on nearby tables.
This is great news for your company and your website. Our love for mobile devices makes it easier for your current and prospective customers to access your site.
According to Statista, more than half of the global web traffic comes from mobile devices:
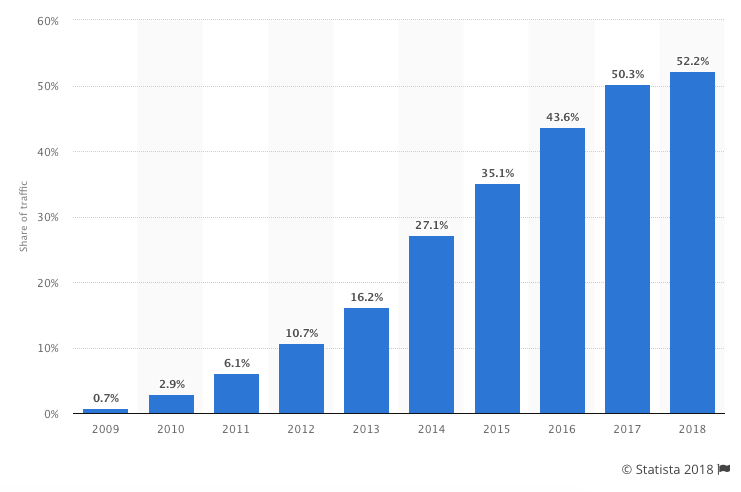
As you can see from this graph, this number continues to grow each year. I expect this trend to continue in the years to come.
This percentage is even higher in some areas of the world. For example, more than 65% of web traffic in Asia comes from mobile devices.
If you’re not optimizing your content and your website as a whole, you’re likely not making the most of your traffic.
Additionally, it may be preventing you from getting more traffic.
Google has made it clear that it wants to serve mobile users mobile-friendly web pages.
Optimizing your website and content for mobile is a must, even though it might seem like another chore to do.
Not only will it help you get more SEO traffic in both the short and long term, but it will also help you with your conversion rates because a smaller percentage of your traffic will bounce.
No matter what industry you’re in or where you’re located, your site needs to accommodate mobile users. How can you do this?
I’m here to explain the top principles of an effective mobile web design. If you can apply these concepts to your mobile site, you’ll benefit from an increase in traffic and more engaged users.
In this post, I’m going to show you the several ways you can optimize content for mobile. I encourage you to put as many of them into effect as possible.
A quick definition of mobile-friendly
I don’t want to jump ahead too far.
If you’re already familiar with what mobile-friendly means, feel free to skip ahead to the next section.
Otherwise, it’s really not that complicated.
As the name implies, mobile-friendly content just means that content appears well not just on desktop computers but also on smaller mobile devices.
That means that the text is easily readable, links and navigation are easily clickable, and it’s easy to consume the content in general.
Let’s begin with a test: It’s important to know where you stand. If your content is already mobile-friendly, you won’t need to do all the things in this post.
There are two main ways that you can test your site for mobile-friendliness.
The first is with Google’s own mobile-friendly test tool, which is something that everyone should use.
Another option is to use a site like this mobile phone emulator, which lets you see what your site looks like on a variety of different phones. It won’t give you a grade like Google’s tool will, but you’ll be able to see if anything shows up weird.
A quick note on responsive design
You’ve probably heard about “responsive” design.
It’s typically used as a synonym for mobile-friendly design although that’s technically not true.
There are a few different strategies to create mobile-friendly websites, and using responsive design is just one of them.
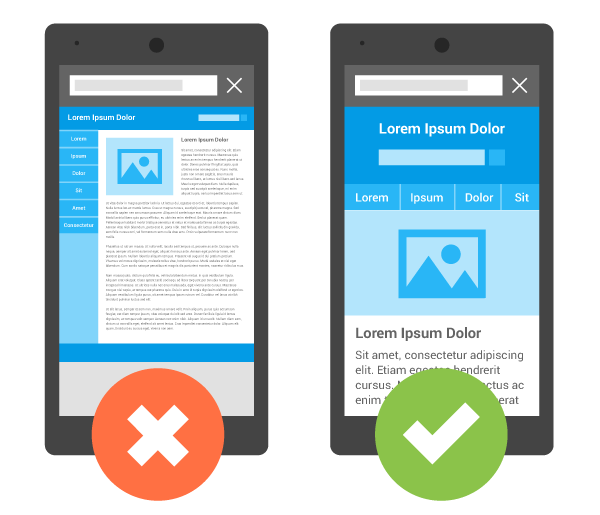
It means that as the screen’s size changes, the content adjusts to match that size:
That being said, responsive design is a clear winner in most situations.
Because of that, some of the tactics I’m about to show you are based on the assumption that you will implement responsive design as opposed to one of the other methods for creating mobile-friendly pages.
Here are 14 tips for making your website mobile-friendly.
1. Install a responsive theme
If you want a quick fix then you can consider changing your theme entirely.
For an established site this probably not best option but if it is a low traffic site, or you are just getting started, then installing a brand new responsive theme is a easy solution.
If you are using WordPress then changing your theme is simple.
Head over to your WordPress dashboard and under ‘appearance’ click on ‘themes’ and then click on ‘install themes’.
Put in ‘responsive’ and hit search.
What this will do is bring up all of the themes in the WordPress database that are responsive, including the responsive theme, which is actually quite nice, and obviously responsive, and they also have hundreds of other themes for you to choose from.
Choose the one that’s best for your site, and that’s responsive, and install it.
Double check that your new theme looks great on all devices, and make sure you still follow the rest of the tips below to ensure everything else is up to par.
2. Simplify your menus
Obviously, mobile screens are significantly smaller than laptop or desktop screens. Keep this in mind when designing your menu options.
The menu of your desktop site can be more extensive and have lots of options. But this complicates things on a smaller screen.
You don’t want visitors to have to scroll or zoom in and out to see all the navigation choices. Everything needs to be concise and fit on one screen.
Here’s a great example of this concept applied by Domino’s Pizza:
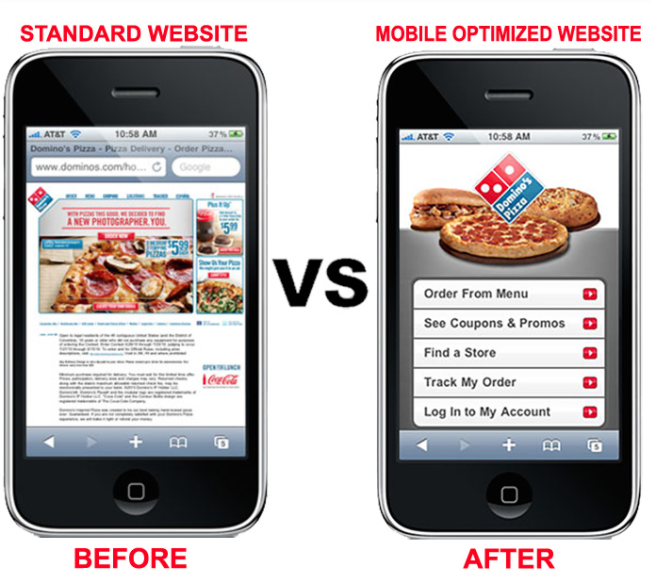
Take a look at what their standard website looked like on a mobile device before it was optimized. Navigation was nearly impossible.
Users had to zoom in to see the menu to find out how to proceed. If your mobile site is the same, it will crush your conversions.
But look at how simple this menu is on a mobile-optimized site. Dominos was able to simplify its entire website into five menu options.
Each option fits on the screen and has a clear destination. Evaluate your current website, and try to simplify the menu options for mobile users.
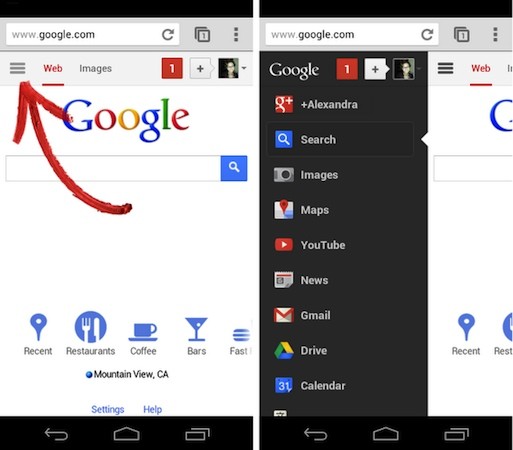
For most websites the typical sidebar is useless on mobile as well.
It gets pushed down to the very bottom of the page and barely ever gets used.
So, unless you can create a fancy sidebar like Google did, it’s probably better to remove it altogether for mobile users.
3. Keep forms as short as possible
Think about all the different forms you have on your website. If you’re asking the visitor for a lot of information, it’s not an effective approach.
Instead, you should change the design to keep your forms short.
Again, if someone is filling out a form on their computer, it’s not as big of an issue because it’s easier to type and navigate on a larger screen. But this isn’t the case with smartphones and tablets.
Evaluate your forms, and ask yourself whether you need each line.
For example, if you’re trying to get users to subscribe to your email list, you don’t need their home addresses and phone numbers.
Forms designed for buying conversions shouldn’t ask the user what their favorite color is. Get their billing and shipping info, and end it.
In fact, a long and complicated checkout process is one of the top reasons for shopping cart abandonment:
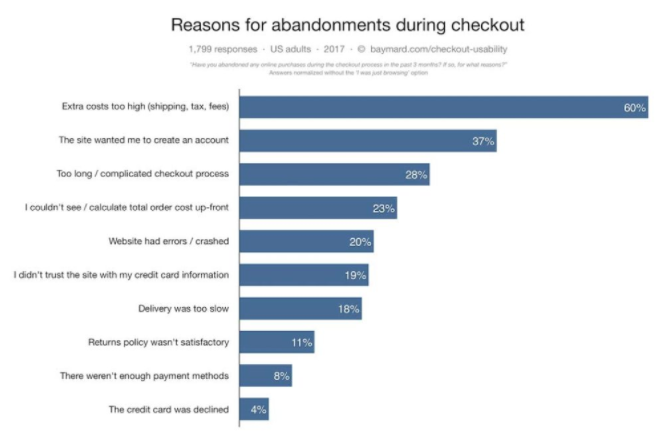
If you want to reduce shopping cart abandonment rates from mobile devices, you’ll need to change the design of your mobile website forms.
4. Clearly display your CTAs
Let’s continue talking about conversions. To have an effective mobile web design, your call-to-action buttons need to be obvious.
Since we’re dealing with a smaller screen here, you don’t want to overwhelm the user by trying to squeeze more than one CTA on the screen.
Think about your goal for each landing page. Are you trying to get downloads? New subscribers? Increase social media presence? Get visitors to buy something?
Your CTA needs to focus on that primary goal.
Focusing your attention on your CTA buttons will give you an edge over your competitors. That’s because 53% of websites have call-to-action buttons that take users more than three seconds to identify.
That’s far too long. Your CTA should be easy to spot in just one or maximum two seconds.
5. Include a search function
This design principle relates back to what I previously said about your menu options. Right now, some of you may have a menu with 20 or 30 different options.
It may seem impossible to try to simplify those options to fit on just one page. Well, it can be done, especially if you add a search bar to your mobile site.
Encouraging users to search for what they want reduces the need for you to rely on a large and complex menu. Too many options will confuse the visitor and kill your conversions.
This feature for sure needs to be incorporated into the web design of ecommerce sites. Let’s take a look at the home screen of an industry giant Amazon:
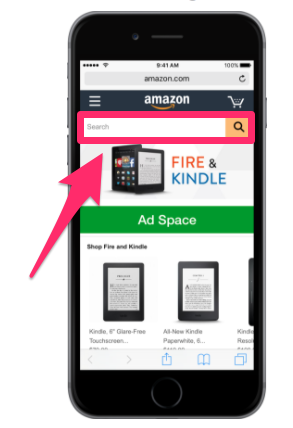
Amazon sells over 12 million products. Take a minute to let that number sink in. I’m willing to bet your website doesn’t sell nearly as many products.
I’m not saying this to make you feel bad. But I want you to realize that if Amazon can use a search bar to help mobile users browse through millions of items, your company shouldn’t have any issues applying the same concept for hundreds or thousands of products.
Implement a search bar to simplify your design and make it easy for mobile users to find exactly what they’re looking for.
6. Make customer service easily accessible
No matter how much time and effort you put into simplifying your mobile web design, people will still have issues.
Don’t worry, it’s all part of running a successful business and website. But the key here is being able to quickly and effectively help your mobile site visitors work through their problems.
Make sure you’ve got obvious customer support information on your mobile site.
Provide your phone number, email address, and social media profiles. Display anything that gives the user an option to contact a representative from your company as fast as possible.
Put yourself in the shoes of a frustrated mobile user who has a question or problem. If they can’t get help from your customer service team, it’ll leave them with a bad impression of your company.
Adding obvious customer support information to your mobile web design is something that can’t go overlooked.
7. Size matters
Navigating a website from a desktop or laptop computer is simple. It’s easy to control a cursor from a mouse or keypad.
But browsing with your thumbs on a 4-inch screen isn’t as easy. Keep this in mind when laying out different elements of your mobile site.
Buttons need to be large enough to be tapped with a finger. Make sure you keep enough space between buttons so someone doesn’t accidentally click the wrong one.
Having to tap the same button several times to make it work will frustrate mobile users visiting your website.
You also need to keep in mind the placement of clickable items on the screen:

Keep in mind 75% of smartphone users use their thumbs to tap on the screen.
This image shows you the best location on the screen to place buttons. Avoid the corners: it’s hard for a person to reach those places with their thumb while holding a mobile device.
The reach decreases further as the screen size becomes larger. It’s in your best interest to place the most important elements and clickable buttons toward the middle of the screen.
8. Eliminate pop-ups
Get rid of pop-ups on your mobile site. For the most part, people don’t like pop-ups as it is. They are annoying and hinder the user experience.
The problem with pop-ups on mobile devices is they become even more of a nuisance because they are so difficult to close.
Recall that people use their thumbs to tap on small screens. The small “X” button to close a pop-up will be so small on a mobile device that users won’t be able to close the window.
They might even accidentally click on the ad while trying to close it. They’ll get brought to a new landing page, which will ruin their experience.
Sometimes users will try to zoom in on the close button to make it easier to tap, but then the dimensions of the screen get messed up as well.
It’s best to remove these pop-ups altogether. Come up with other ways to promote whatever your pop-up is advertising.
If you do decide to keep a popup on your mobile site then be sure to do a lot of testing.
I’ve certainly experimented with using pop-ups to collect email addresses on my sites, and you should try them on yours as well.
However, you have to be very careful.
Many cheap pop-up tools and plugins look fine on desktop screens but completely ruin the user experience on mobile devices.
They’re often difficult to close, and sometimes you can’t even close them.

Not surprisingly, they cause visitors to instantly close the window.
Other than simply removing the popup on mobile (which is what I still recommend) there are two other solutions to a pop-up problem on mobile devices:
Solution #1 – Simplify them: One solution is to make your forms as simple as possible to fill out (minimize the number of fields) and make them easy to close.
This is probably the worst solution, but it’s still better than sticking with whatever default pop-up you’re currently serving.
Solution #2 – Only use pop-ups when a visitor clicks: This is another great option.
If you’ve heard about content upgrades, you may have already seen it in action.
The idea here is that you don’t use pop-ups that come up after a visitor spends a certain amount of time on your pages.
Instead, you offer them some sort of lead magnet and tell them to click a link to get it. Then, the pop-up will come up and ask for their information.
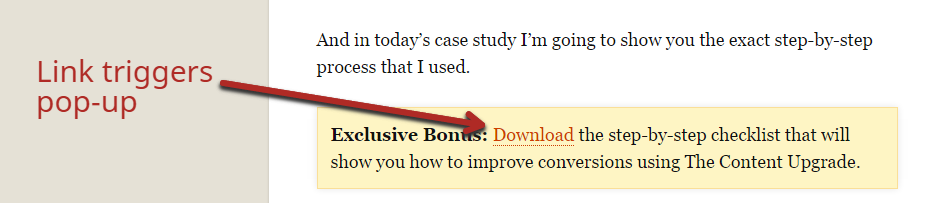
People are much more receptive to pop-ups in this situation because they’re the ones who asked for it.
9. Avoid large blocks of text
Reduce the amount of text on the screen of your mobile website. Obviously, you’ll need to use some words to communicate with your visitors, but keep sentences and paragraphs as short as possible.
Large blocks of text are overwhelming and difficult to read. Remember, if a paragraph is two lines long on your desktop site, it might be six lines long on a smartphone.
Take a look at how typography affects conversions:
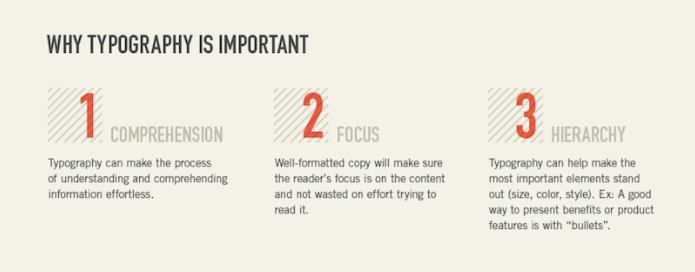
Keep these three elements in mind whenever you’re adding text to your mobile site.
Can the visitor comprehend your message? Where is their point of focus? What is the visual hierarchy?
Eliminating large blocks of text makes this possible.
10. Choose the right font
Let’s continue talking about the text on your mobile site. Picking the right font is a crucial design principle as well.
Fonts need to be clear and easy to read. But you can also use fonts to set two lines of text apart.
You don’t want the text of one line to run into the text of another.
For example, you could use all capital letters and bold font for the headline of a section. Then use regular capitalization rules and non-bold font for the line underneath to show a clear separation.
You’ve got a small space to work with, so you can’t rely on a page break or image every time you want to separate text.
11. Prioritize speed
No matter what changes you implement on your mobile website, you need to keep its speed in mind.
Research shows that 53% of people will abandon a mobile website that takes more than three seconds to load. Take a look at how these bounce rates increase with increasing page loading times:
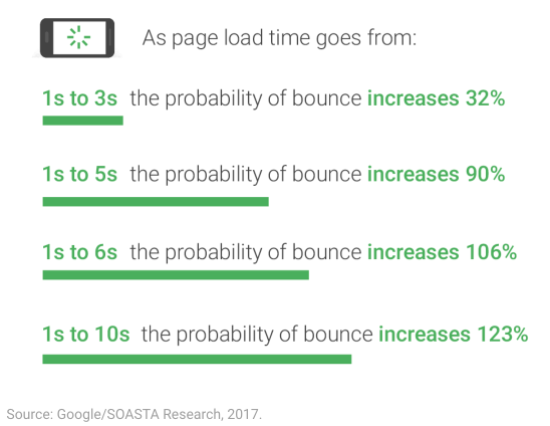
The best way to keep your page loading time as low as possible is by simplifying your design.
Fortunately, if you follow all the other principles I’ve outlined so far, this shouldn’t be an issue.
Eliminate unnecessary heavy images and flashing lights. Simple websites load faster and have higher conversion rates.
12. Widths should be in terms of percentages
Lets get a bit technical. All HTML elements (e.g., “divs”) have some sort of width assigned to them.
If you right-click any element on a web page and then choose “inspect element” (in Chrome), you’ll see a panel come up.
If you click on an element in the left window of the panel, the corresponding CSS (style properties) values will be displayed in the right window.
You will typically see a value for “width” specified, like this example shows:
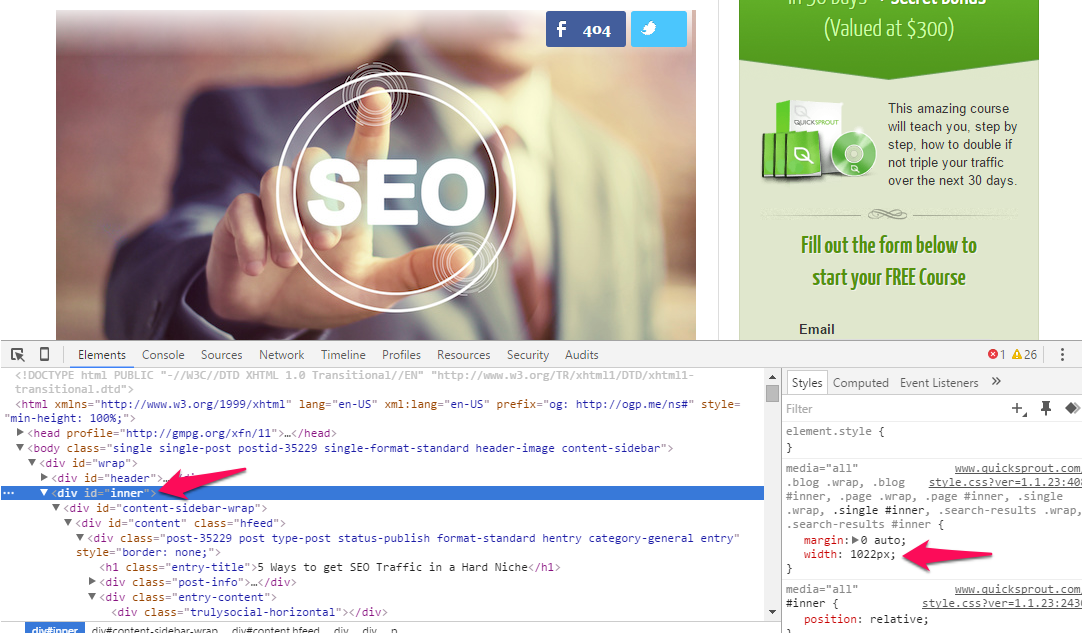
This value can be set in terms of pixels (essentially tiny blocks on the screen) or a percentage.
When you assign 50% as a value, that tells the browser to make that element 50% of the width of the screen (or of the section that it’s contained in).
This is a good thing because if the screen is smaller, that section still shrinks to fit half the screen, which keeps things looking how they should.
If you instead specify widths by pixels, the widths of those elements do not change as the screen size changes.
If the width of a section in pixels is bigger than the screen size (common for phones), the user will have to scroll horizontally, which is a pain on mobile devices.
What you should do about widths: If you bought a good theme or hired competent developers, you don’t have to worry about this too much.
However, if you ever design your own landing pages or modify your theme, keep in mind to specify widths as percentages.
If you’ve used pixels in the past, track those down and fix them now.
This is a simple change that will make a big difference.
There is one exception, though. You can specify pixel widths if you know how to use media queries effectively.
What are media queries? Read on…
13. Use media queries to make your site responsive
The real key to using responsive design is to use media queries.
Again, if your site is already responsive, you don’t have to worry about this unless you start creating your own custom pages.
But if the situation comes up, you’d better know how to handle it.
Have you ever wondered how some pages not only resize as the screen size changes but also reshape?
Certain sections might get wider or thinner than before, and other elements may move altogether (navbars and sidebars).
The answer is that the site uses media queries to truly make the site responsive.
Here’s what a basic media query looks like (you can find them in the CSS of some pages):
@media screen and (max-width: 1020px) {
#container, #header, #content, #footer {
float: none;
width: auto;
}
p{ font-size: 2em; }
}
There’s a lot to see here, so let’s break it down into simple chunks.
Right at the start of the line, the media query is labeled with the “@media” tag.
The “screen” part is standard to include and means that the media query will be applied based on screen size.
The most important part is the stuff in the brackets.
You can specify both “min-width” and “max-width.”
In this case, the max-width is 1020px.
This means that when the screen is up to 1020 pixels wide, all the CSS code inside this media query should apply.
The code inside will be given priority over other codes for the specified elements.
Going back to the code, you can see a bunch of normal CSS code inside the outside curly brackets for the overall media query.
You can see that when the screen is under 1020px wide, any elements with an id of “container,” “header,” “content,” or “footer,” will now have “auto” width and a float value of “none.”
Similarly, all text in paragraph tags (p), will have a font size of 2.0 em.
Applying this is simple.
Load your webpage, and then drag a corner to make the screen smaller.
If you notice that certain parts become hard to read at a certain point, create a media query. Change it so that your content elements become larger or smaller, whatever is needed to make the content more mobile-friendly.
Note that you can apply multiple media queries to a page. Just specify a maximum and minimum width, and make sure they don’t overlap.
14. Get ahead of the curve with Accelerated Mobile Pages (AMP)
Accelerated Mobile Pages (AMP) are still HTML pages, but they follow a specific format.
Google has teamed up with a bunch of huge brands to create and support them.
These pages get priority in the search results of mobile users for certain relevant queries.
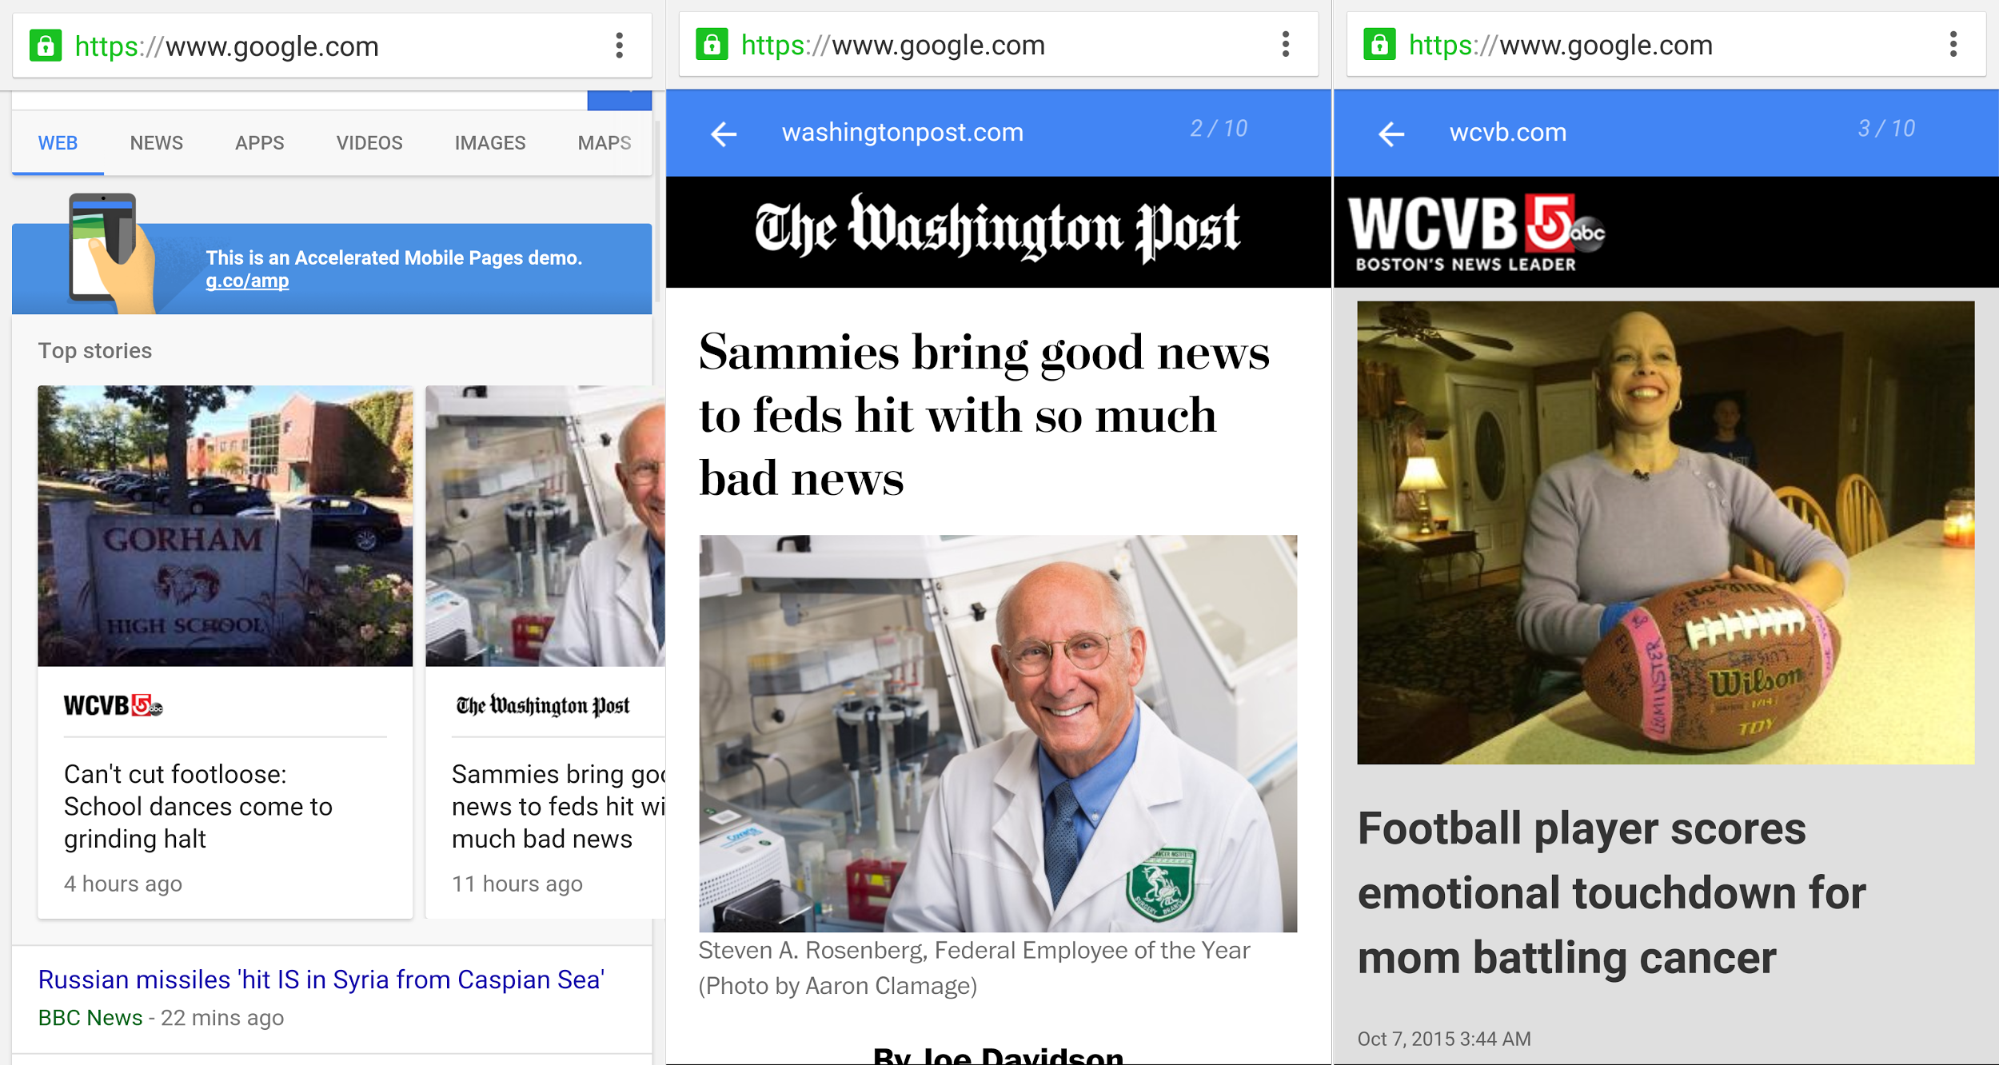
The whole point of them is that they load really fast for mobile users, which is why Google is encouraging content creators to make them.
If you’re interested in seeing a demo, use your mobile device, and search for something on https://www.google.com/webhp?esrch=AcceleratedMobilePages::Preview.
Should you create AMP? I can’t give you a definitive answer. On the one hand, they may help get you some extra traffic, but I haven’t experimented with them enough to conclude anything.
The one downside is that you need to maintain two versions of your content. The good news is that it’s easy with WordPress because there’s actually a plugin for that—all you need to do is enable it.
Finally, if you’re interested in creating AMP on your own non-WordPress site, here’s the official tutorial. I’d create my own, but Google’s will always be better.
If you have the extra time and resources, I’d encourage you to test out AMP, but most businesses will be better off to wait a bit and see if they get adopted more widely first.
Conclusion
If you’re not optimizing your content for mobile users, you’re behind the curve and missing out on traffic (and wasting some of your current traffic).
Your website needs to be optimized for mobile users. To do this effectively, you need to understand some important design principles.
Simplify your menu choices, and keep forms short. Make sure your CTAs are clearly displayed, and stick to one CTA per page.
Add a search bar to help improve navigation while clearing up space on the screen. You should make it easy for mobile users to contact your customer service team.
Realize that people are using their thumbs to tap on the screen, so buttons need to be sized accordingly. Get rid of pop-ups as well.
Carefully select an appropriate font that’s easy to read. Eliminate large blocks of text on the screen and follow the rest of the tips in this guide.
No matter what, make sure your mobile site loads as fast as possible.
Follow these top mobile design principles to maximize traffic and conversions on your mobile website.
Source Quick Sprout https://ift.tt/2FpFrcn
Do I pay national insurance now I’m self-employed?
Question
I have 44 years of fully paid-up national insurance contributions (NICs). I became self-employed in September 2018. Do I still need to pay national insurance? I’m due to get the state pension in February 2022 but will probably retire in 12 to 18 months’ time.
From
DM/Dovercourt
Like most employed people, you are required to pay NICs if you are under state pension age. There are two types of national insurance if you are self-employed – class two and class four. Class 2 is payable at £2.95 a week if your profits are £6,205 or more a year. Class 4 is paid if your profits are over £8,424, in that case you pay 9% of your profits between £8,424 and £46,350 and 2% on profits over £46,350.
Image

Section
Work & family EmploymentFree Tag
national insuranceAsk Experts Blurb Top
Source Moneywise https://ift.tt/2We78dD
Let’s celebrate the Isa’s 20th birthday
In the world of finance where jargon and complexity reign, there is one product that stands out for its simplicity – the Isa.
Its function is simple. Whatever money you put in or make doesn’t get taxed. None of it. Interest made on savings? No tax. Capital gains on investments or dividends? No tax. It’s very straightforward.
The consumer-friendly simplicity of the Isa is no doubt one of the reasons as many as 42% of adults hold one. And why they’ve lasted longer than most financial products: Happy 20th birthday, Isa!
For millions of us, a Cash Isa is the first port of call when we’re ready to start building a savings pot for the future.
The Stocks and Shares Isa is where millions begin their investing journey.
The popularity and well-known brand of the Isa is perhaps why successive governments have appeared hooked on launching new ones.
At their launch in 1999, there were two types of Isa; now there are six.
When former Chancellor George Osborne wanted to launch a product to make investing for children easier, he launched an Isa – the Junior Isa.
When the government wanted to support first-time buyers, Mr Osborne launched the Help to Buy Isa. And to boost retirement savings – the Lifetime Isa.
The result has been that something that was well-loved for its simplicity has now been clouded with complexity so that it takes some time to unpick the pros and cons of each type of Isa to work out which one is best for you.
My fear is that this complexity is enough to put people off Isas altogether. This would be a great shame as the tax breaks and free government cash they offer is more generous than ever. The Lifetime Isa, for example – the latest edition to the Isa family – offers £1,000 towards your first home (or retirement savings) for every £4,000 you manage to save yourself. Not bad at all.
That’s why we’ve put together a free 16-page Easy Isa Guide, covering each type and its various foibles and positive features.
We also have a last-minute guide answering the most-common Isa questions, while Darius McDermott warns of the eight last-minute Isa mistakes people make and how you can avoid them.
But if you’re reading this and thinking – “Ha! I’ve done all this already – my money’s been carefully cocooned in an Isa for years” – learn from my mistake and watch out!
I had £2,000 in a Cash Isa that I’d diligently squirrelled away before university. It was in those dreamy days of proper interest rates and I’d put it in an account earning 5% interest a year.
In my final year I went to my local branch to check up on it. Off I went with a spring in my step, expecting to hear of all the lovely interest I’d accrued by leaving it to grow.
The bank clerk laughed openly at my utter bewilderment when they told me that for the last three years it had earned just a few pennies.
After that first giddy year of 5% interest, the rate had dropped to nought-point-something-abysmal.
Until that point, I had thought abstemiousness was rewarded.
But my Isa anger turned out to be a pretty good introduction into the world of personal finance, where the default is that loyalty costs and where if you turn away for a minute you’ll be slyly pushed on to a rubbish deal.
So when I checked my monthly broadband bill last week and found it had doubled since I signed up two years ago, I was furious – but not surprised.
It’s worth giving your Isas a spring-clean every year, to check you’re getting the best deal and you’re saving into the best type for you.
And if you’ve not already done it, do it soon. You can put up to £20,000 into Isas this year – but if you miss the deadline of 5 April, it’s gone.
- Email editor@moneywise.co.uk
- Twitter @rachel_spike
- Post The editor, Moneywise, 8 Devonshire Square, Office 03W112, London EC2M 4PL
Section
Investing Investment IsasFree Tag
investment ISAImage

Workflow
Published
Source Moneywise https://ift.tt/2Fpsijo
Eight last-minute mistakes that could cost you your Isa allowance
Leaving things to the last minute is human nature. Whether it is packing for a holiday, studying for exams, filing tax returns or topping up your Isa, most of us are guilty of procrastinating in some area of our life and end up having to do important things in a rush.
The trouble is that if you miss a deadline, there can be repercussions: failed assignments, fines and, in the case of our annual Isa allowance, losing out on it altogether to the detriment of our future financial well-being.
Whether you invest by post, by phone or online, there are a number of common mistakes made each year that cost investors. The good news is that they are all avoidable. Here are eight tips to avoid Isa disappointment:
1. Sign on the dotted line
The most common mistake in my experience is that too many investors forget to sign their application form or cheque. Always double-check your forms before heading off to the post box or hitting ‘send’.
2. Know your provider
Perhaps the second most common mistake is that people make the cheque out to the wrong company. Read the instructions carefully – it could be a platform, rather than your intermediary, that should be the payee.
3. Get your address right
If you have moved house since you last put money in an Isa, make sure you have informed your bank, intermediary and Isa provider. If you have registered a different address with your bank and your Isa provider, your investment may get stopped.
4. 1st, 2nd or guaranteed delivery?
If you want to guarantee you use your Isa allowance, I find it is best to send application forms and cheques via guaranteed overnight delivery, rather than rely on first or second class post. It may cost more, but at least you know they will arrive on time.
5. Want an income? Tick the box
A mistake you often don’t know about until well into the new tax year is that if you want an income but don’t tick the right box, you won’t get the payment you are expecting. That is unless you indicate that any income generated by your investment is to be reinvested, rather than sent to you.
6. Don’t rely on your bank
Mistakes are not just made with written applications. Online investing can be troublesome too. Can you guarantee your bank won’t have any glitches and your debit card will work at 11pm on 5 April? It’s a good idea to let your bank know if you want to transfer a large sum of money, so it doesn’t need to talk to you first and make your investment a good few days ahead of the deadline.
7. Computer says “no”
It’s all very well having 24/7 access to the internet, but what if your broadband is down or your computer freezes? Don’t leave it until the very last minute and save yourself the stress of watching the wheel of death on your monitor.
8. Don’t lose it – invest now, decide later
If the reason you are procrastinating over your Isa is that you don’t know where to invest this year, your hesitation is understandable: stock markets have been volatile and there has been a lot of geopolitical uncertainty of late. However, while you do need to invest your Isa allowance before 5 April in order not to lose it, the good news is that you don’t need to decide where to put it straight away.
Isas today are fully flexible and you can transfer from cash to investments and back again as much as you like. So you could invest in a Cash Isa for now and switch it into an investment fund at a later date. Another alternative is to invest in a fund you already know and like, and switch it when you have had time to think more carefully about your investment. Some Isa providers also have a ‘cash park’ option that you can use while you decide what to invest in.
Past performance is not a reliable guide to future returns. You may not get back the amount originally invested, and tax rules can change over time. Darius’s views are his own and do not constitute financial advice.
Section
Investing Investment IsasFree Tag
investment ISAImage

Workflow
Published
Source Moneywise https://ift.tt/2Wf5adc
How to Create An Impactful About Page For Your Website
You need to put lots of thought and effort into every page of your website.
But your About page is arguably one of the most important pages by far.
Is it really that big of a deal? How many visitors will actually take the time to check out your About page?
Well, here’s an interesting statistic.
According to a study from KoMarketing, “52% of your visitors want to see an About page.”
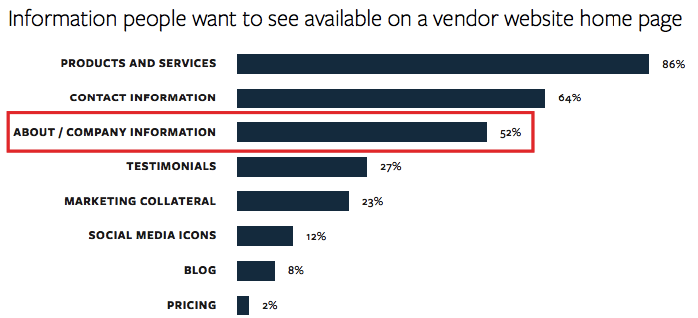
Without one, you’re instantly creating some distance between your company and over half of your visitors.
That’s why an About page is more important than you may think.
And here’s something else I’ve noticed.
A lot of brands (even some of the bigger ones) lack in the About page department.
Some fail to include an About page altogether, and others halfheartedly slap one together without putting any real thought into it.
Such About pages often miss the mark, which throws a wrench in the overall sales funnel.
I want to be fair and say that not everyone needs an About page. But most companies, individuals, and websites do. It’s a standard thing to do.
And it can be really valuable. As long as you do it right!
Put yourself in the mindset of a website visitor who is reading your About page.
They’ve already stumbled upon your website, so they have a general idea of who you are and what you do. However, they may not be ready to become a customer yet.
This is the perfect opportunity for you to convince them. I see many About pages on a daily basis that are boring and don’t provide any value to a website.
It’s as though some companies write their About pages as fast as possible because they think it’s just a requirement to be fulfilled.
You put much effort into scaling lead generation through blogging, which you have to update on a regular basis. But your About page will be much easier since you don’t have to update it as frequently.
If you do it right the first time, your About page will help you get more conversions and sales.
In this post I will explain everything you need to know about how to create an About page that is well crafted and that will resonate with your visitors.
Redefining an About page
First of all, let’s start with a formal definition of an About page.
According to Your Dictionary, it’s
a type of web page commonly seen on websites, containing general information about the person or organization that is responsible for the website in question, usually a description of the site’s history and mission or purpose.
Most people probably would say this definition is spot on.
But in my opinion, it has one fatal flaw.
It talks about only the person/organization and doesn’t address the needs or concerns of visitors.
Of course, you’ll want to talk about your company, its history, philosophy, values, achievements, etc.
But there’s more.
A great About page will answer some major questions for your visitors.
What types of questions should I answer?
Copyblogger nails it in this article.
Here’s their take on things.
Some of your visitors’ unanswered questions are:
- What’s in this for me?
- Am I in the right place?
- Can this person help me with my problem?
Don’t send your readers screaming for the exit by talking only about yourself. Instead, make them want to pull up a chair, chat with you a while, and keep in touch long after the party.
How many times have you clicked on an About page only to hear a company ramble on about how awesome they are without ever answering any of the pressing questions of their visitors?
I see it happen all the time.
What you should aim for
The point I’m trying to make here is that the term About page can be a little misleading.
It shouldn’t be just about you. It should be about your audience as well.
And now, here’s my formula for telling a gripping story.
Know thy customer
I’m sure you’ve heard the Ancient Greek aphorism “know thyself.”
It speaks to the importance of an examined life.
But when it comes to an About page, you want to thoroughly know your customer.
And I’m not talking just about gender, income level, education, etc.
You need to know where your average person is at in the sales funnel.
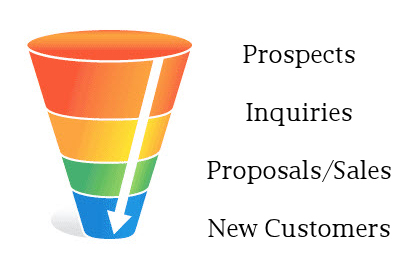
And if they’re looking at your About page, it’s safe to say they’re in the earlier stages of the sales funnel.
The large majority will be prospects with some level of interest and minimal awareness of your brand.
Most are looking to become more familiar with you.
Not only do they want to know more about your product/service, many want to know if you share their values and beliefs.
Try to put yourself in the shoes of an average prospect and figure out what specific information they’re seeking.
This will guide your efforts.
Start with a strong headline
Your headline is everything.
If it pops, visitors will want to read on.
If it sucks, many will leave never to return.
What makes a great headline?
You should make your headline simple, clear, and benefit-driven.
Don’t waste space and be repetitive. The website visitor has already clicked on the About section of your homepage, so you don’t need to use that as a headline as well.
Instead, use a headline that enhances your perceived value.
Check out this About Us page from SAXX:
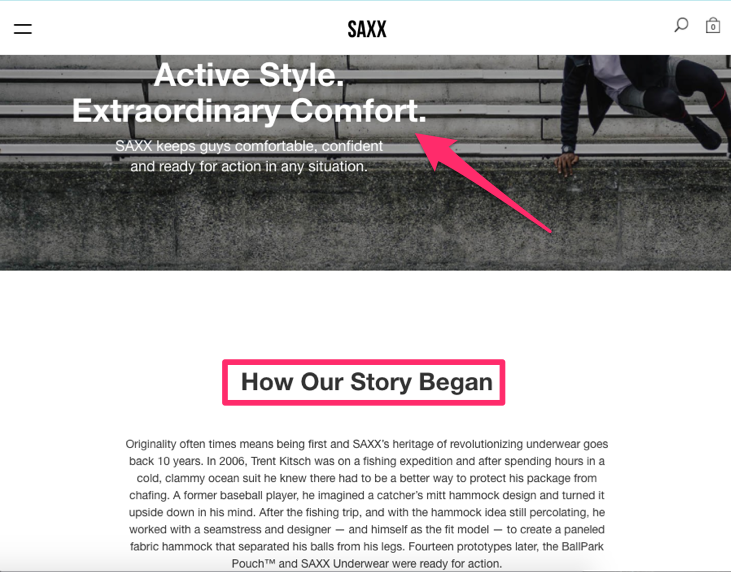
I love this headline because it speaks to the potential customer. SAXX is a men’s underwear brand. So the headline of their About page reflects consumers’ wishes.
Active style. Extraordinary comfort.
This headline is intriguing to say the least. It’s also enticing enough to make the reader continue on the page. If you have a boring headline, people may not even read your content.
The same idea is behind writing a blog introduction that makes the rest of your post irresistible.
I also share this example because SAXX uses multiple headlines on the page. As you read on, you see the second title, “How our story began.”
This makes it clear to the reader what this section is going to discuss: the founding of the company.
You will learn about it through a story rather than cold facts which is always more appealing to a reader.
Here’s another good example from Yellow Leaf Hammocks. You can instantly get a sense of what’s being offered and the benefits. In this case, high-quality, comfy hammocks.

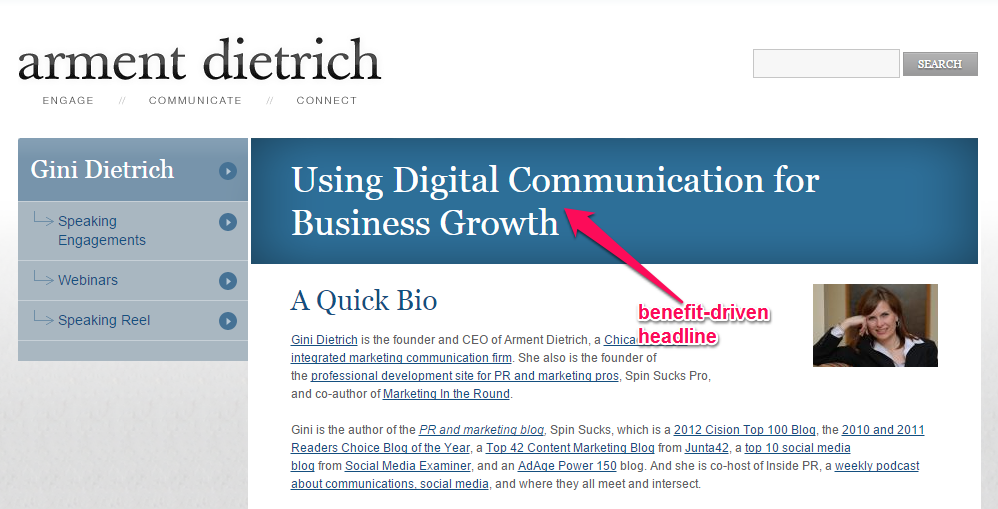
And here is one more great example from Gini Dietrich that uses a benefit driven headline:
Be authentic and transparent
You want to be professional with your About page. That’s a given.
But some brands are overdoing it to the point of sounding stiff and almost robotic.
Unless you’re in a super formal industry (e.g., you’re a lawyer or an insurance broker), I think it’s a good idea to “let your hair down” a little.
Paint a realistic picture of what your company is and what you do.
If you’re snarky, be snarky. If you’re quirky, be quirky.
No matter how teched out we get, business is still ultimately founded on people buying from other people.
And they naturally want to do business with someone they like and trust.
Authenticity and transparency are two major elements in gaining that trust.
I think that Pete Adeny (a.k.a. Mr. Money Mustache) does a great job of doing this on his About page:
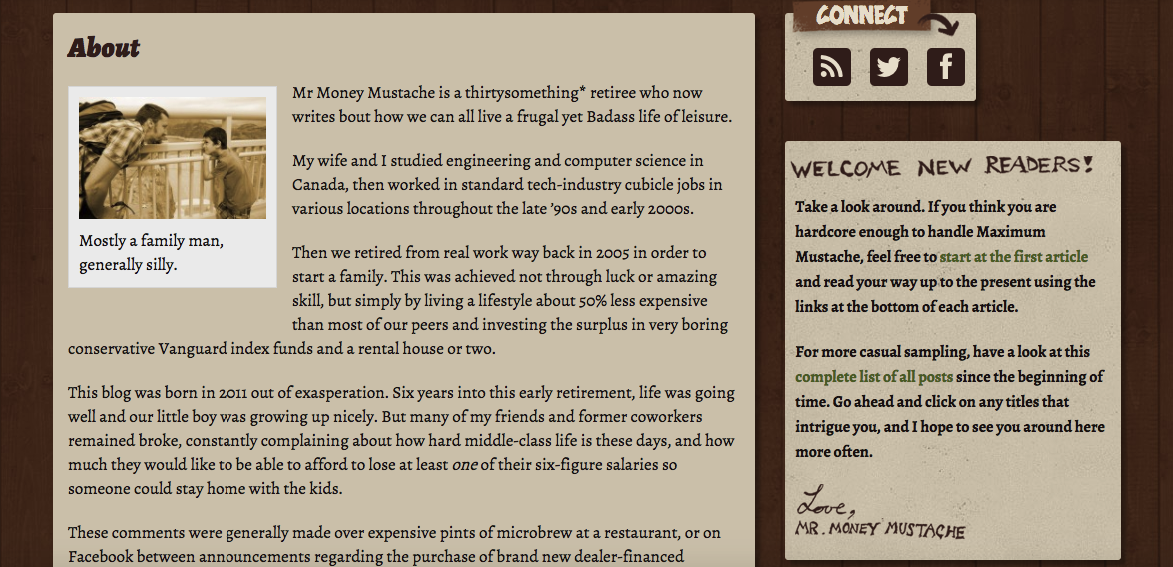
His page instantly allows his readers to get a sense of who he is, his philosophy, and his sense of humor.
Provide a brief but compelling back story
You don’t need (or even want) to go into elaborate detail, but I recommend giving visitors an idea of where you came from and how your company came to be.
In other words, tell them your brand’s story.
Stories keep people interested, ensuring they will read through the page.
If your content is stale, nobody will want to read it. You’ll miss out on tons of potential leads.
Not sure how to tell a story? Just be honest, and talk about how your company got started. You don’t need to go over financial details or anything like that unless it’s very entertaining.
For example, if you found a way to turn a $20 bill into a business, that could be an interesting read. But nobody wants to hear about your startup loan negotiations at the local bank.
Tell a story that focuses on your company’s mission. What was the inspiration for starting your business?
Here’s an awesome example from the TOMS About Us page:
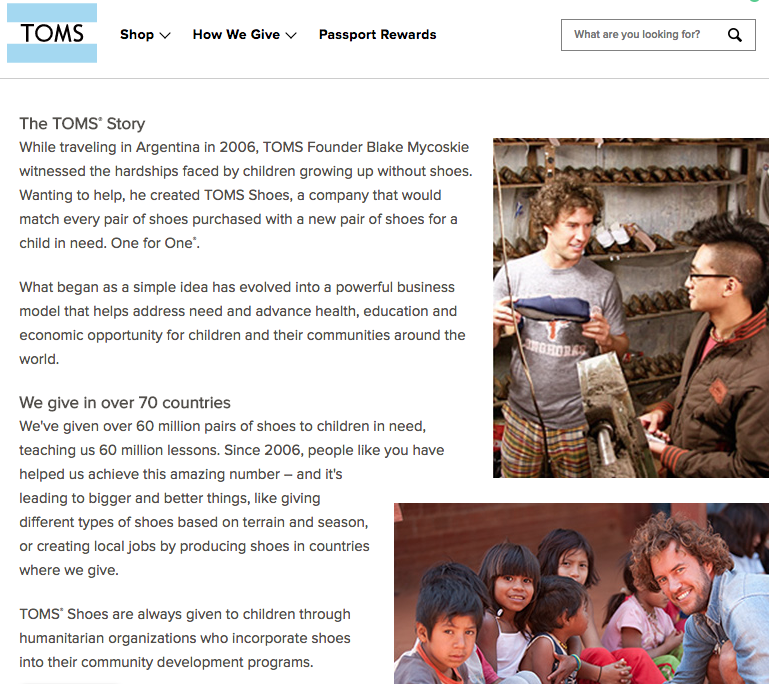
People may or may not be familiar with this organization. Their concept is pretty simple: for every pair of shoes bought on their website, they donate a pair to a child in need.
The inspiration behind TOMS came from the experience their founder, Blake Mycoskie, had when he saw poor children with no shoes. Witnessing that inspired Blake to form this company.
It’s easy to learn how the company became what it is today since it’s told as a story.
It’s heartwarming and touching and stirs a variety of other emotions in a reader.
Potential customers may be moved by this story and inspired to help these children as well by purchasing shoes from the website.
Being this open about their story on the About Us page helps TOMS generate new leads.
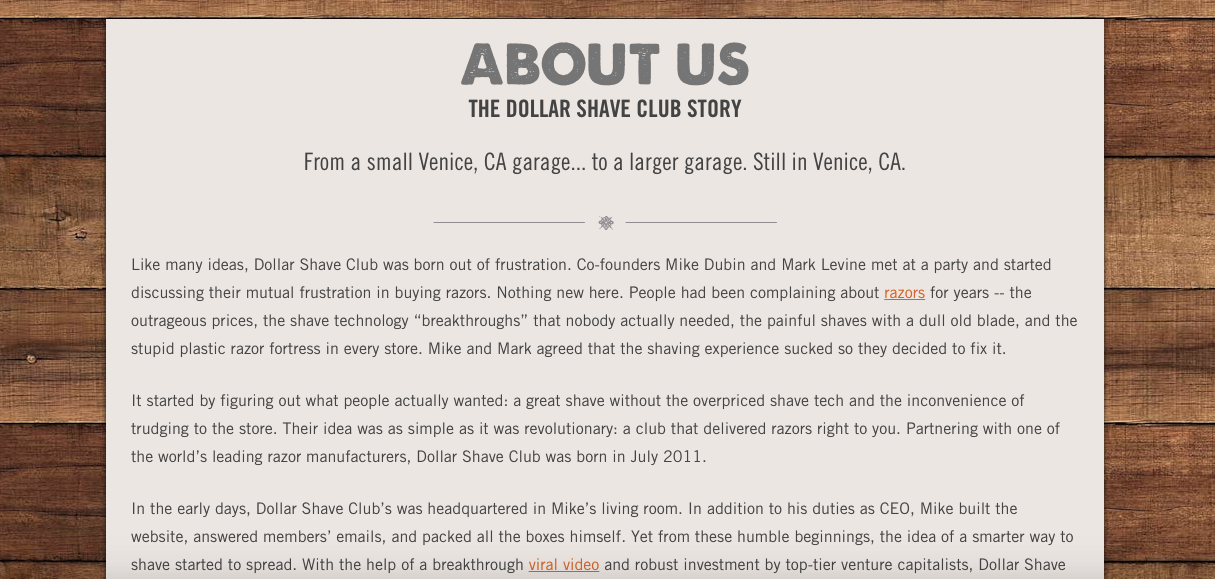
Here is another example showing how Dollar Shave Club does this with its own signature brand of humor:
Be clear about your values
This is a biggie.
You want to offer insight into your company culture and what distinguishes your brand from the rest of the pack.
Yellow Leaf Hammock pulls this off flawlessly as well:

As you can see, there’s a strong emphasis on being socially conscious, sustainable, and adventurous.
Wild Friends Foods effectively conveys its values as well:
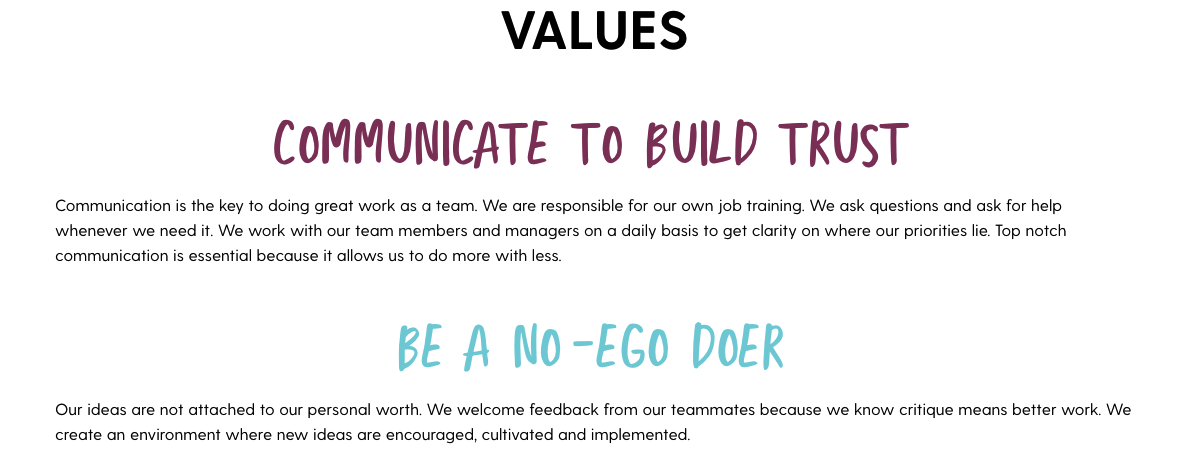
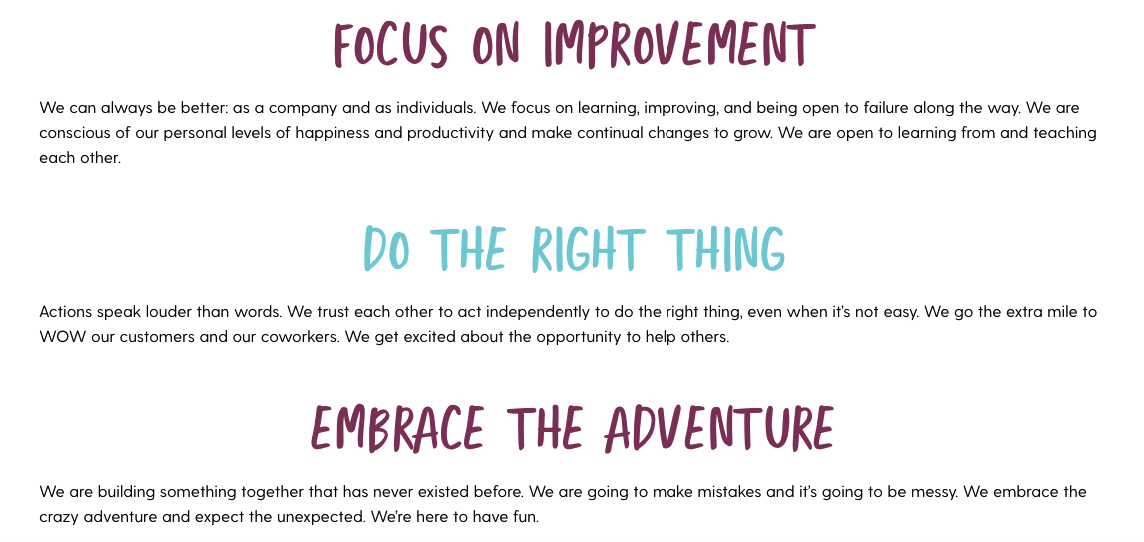
The bottom line is to show visitors what you believe in.
Use terms everyone can understand
Your About Us page should definitely be professional.
Make sure it’s checked for grammatical and spelling errors. Don’t swear or use slang.
While it’s important to make sure your About Us page is clean and proper, you don’t want it to sound like a dissertation written by a professor.
You want to make this page as readable as possible. If people can’t understand what you’re saying, you won’t generate new leads. This isn’t a legal document, so it shouldn’t sound like a team of lawyers wrote it.
Avoid using industry terminology.
Other business owners in your industry may know what you’re talking about, but they aren’t your customers. You need to put things in common language the average person can understand.
Read this About Us page from Apptopia:
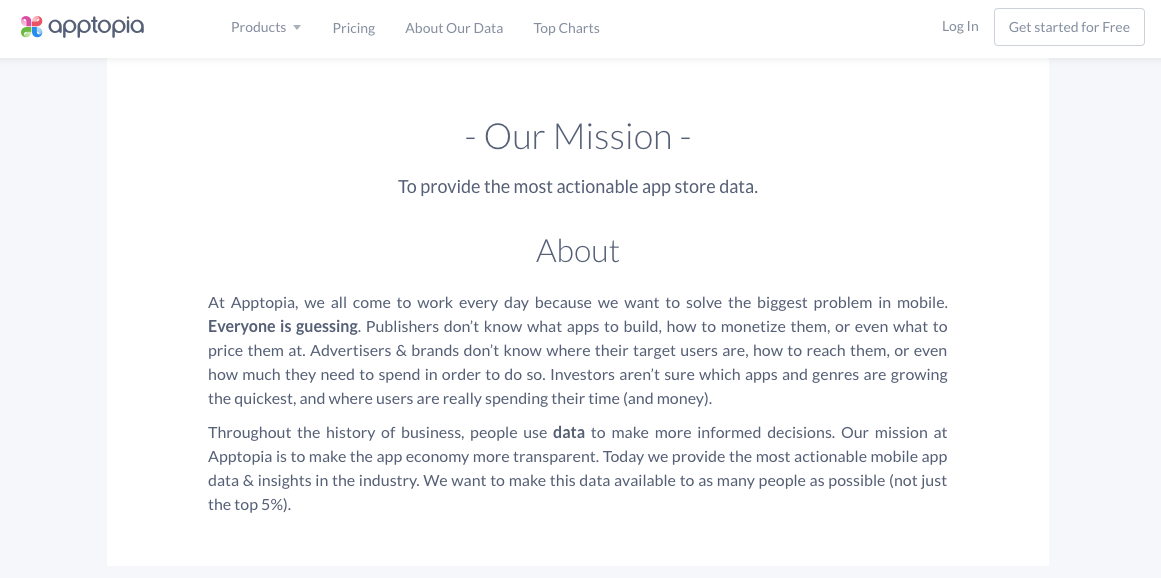
Apptopia is in the mobile application industry. They help businesses acquire more customers with mobile app analytics tools.
This is something that nearly every business can benefit from, but not everyone will understand.
That’s where their About Us page shines. They acknowledge this space is a little bit complicated and people aren’t sure what to do with their mobile apps.
They mention all types of potential customers, including:
- publishers
- advertisers
- brands
- investors.
Their page explains that people use data to help them make decisions, but they aren’t sure how to get and analyze certain data.
This transparency can help their leads feel comfortable. It’s written in plain language everyone can understand. You don’t need an IT degree to decipher this page.
As a result, they’ll be able to get more leads. If their page was super technical, it wouldn’t have the same impact on potential customers.
It’s important to keep this in mind, especially if you’re in certain industries.
Add images to break up the text
I’m a big advocate of using pictures and other visuals to break up written content. If you’ve been reading my blogs for a while, you know I use pictures to aid my writing.
Apply that same concept to your About Us page.
Big blocks of text are intimidating. People aren’t on your website to spend all day reading. So write in short sentences with paragraphs that are only a few lines long.
Use pictures as well. Images can make your About Us page more appealing. It helps people scan content since the photos act as natural breaks in the page.
Here’s an example of how DeWALT uses images on their About Us page:
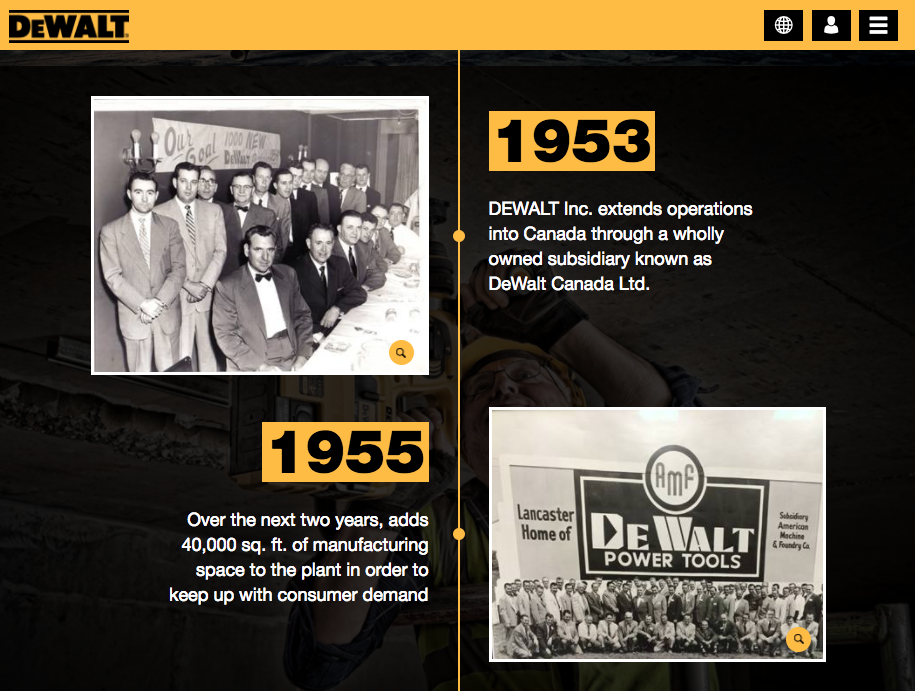
I think this idea is very creative. This page establishes a timeline for their company that dates all the way back to 1922.
For each company milestone, they have a quick description and an image to go along with it. This concept makes it really easy for people to scroll through and learn about the history of this business.
As you can see, the images add value to the written content as well.
Rather than just stating something about a particular milestone, they have photos to illustrate it.
It’s also really cool to see how the quality of these images changes over time.
Now, I realize that not every business has nearly 100 years of photos to use for a timeline. However, that doesn’t mean you can’t use images on your page.
If you’re describing an event, product, service, or person, add a picture to enhance the story.
Feature your best employees
All too often I see About Us pages that focus on the founders of the company. While there’s nothing wrong with talking about your personal accomplishments, it doesn’t mean you can’t showcase your employees.
The average Joe can’t always relate to a CEO. But they can connect with other workers. So including information about your employees helps humanize your company.
It shows there are real people representing your brand. Adding the names, positions, and photographs of your staff also helps add credibility to your business.
So if someone wants to reach out to your human resources department, they know exactly whom to ask for when they call.
Here’s an example of this strategy used by BuildFire:

At the bottom of their About Us page, they feature their entire staff, displaying photographs along with the names and positions.
You can even take this approach one step further and add a small biography of each member of your staff.
Make it memorable
Don’t be boring. If your About Us page doesn’t leave a lasting impression in the minds of the website visitors, it won’t help you generate leads.
Not everyone who visits this page is ready to be a customer at that moment. They need to let that information soak in before they decide to pull out their credit cards and buy something.
So you’ve got to come up with a way to leave a lasting impression. But don’t go too crazy or do anything that doesn’t reflect your company.
Check out this About Us page from Cultivated Wit:
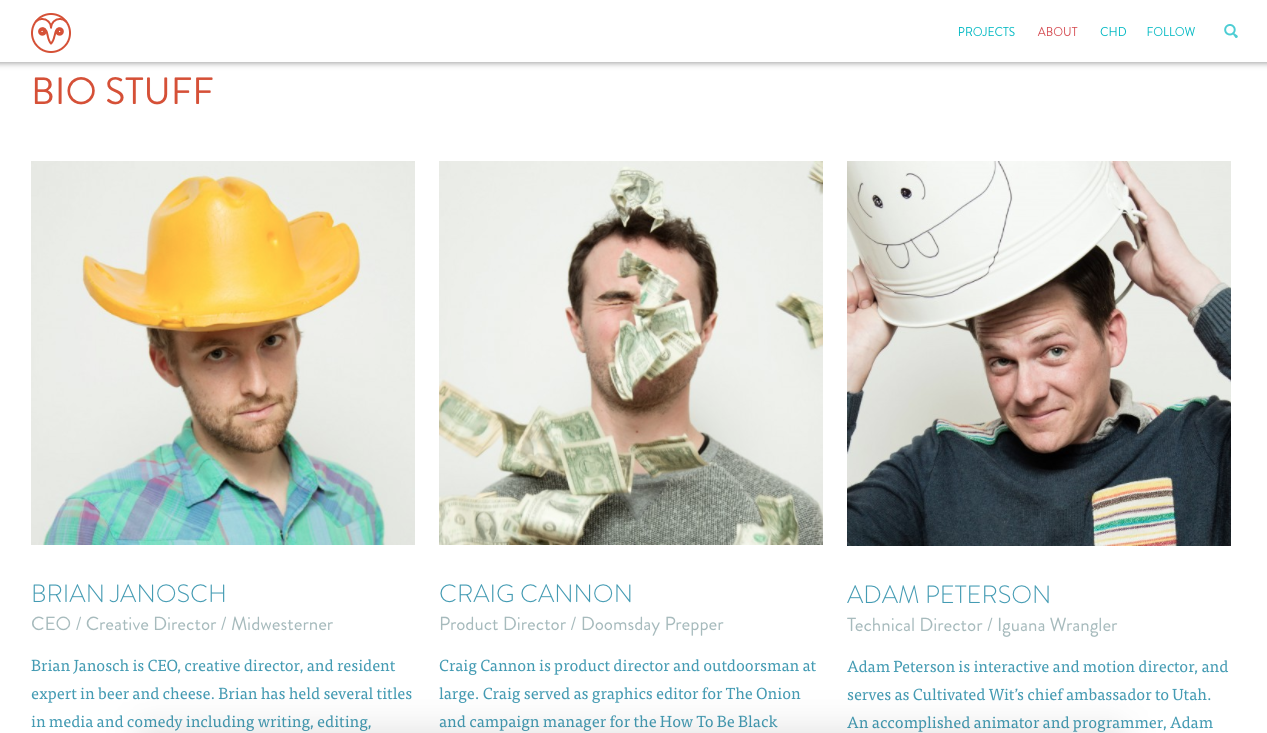
It’s another example of showcasing employees and adding a biography, as I previously suggested.
Look back at the photos in our last example of BuildFire and compare them to the photos from Cultivated Wit. As you can see, there’s a drastic difference.
These aren’t typical or what you’d expect to find on someone’s website. While it’s a little bit out there, it’s done in good fun. Plus, Cultivated Wit is a comedy company, so it fits nicely with their brand.
Photographs like these may not work well for a company that specializes in retirement investments, but it works well in this case.
Depending on your industry and branding strategy, try to have a little bit of fun with your About Us page so it’s memorable.
End with a call to action
So a website visitor got through your entire About Us page. Now what?
You can’t expect them to navigate over to your ecommerce shop and start buying things. While that would be great, you’ll need to give them a sense of direction.
Just because it’s an About Us page doesn’t mean you shouldn’t continue to market your products, services, and brand.
Go ahead, pitch whatever you’re selling. You’ve already got the visitor primed to become a customer if they’ve made it this far. End with a call to action that seals the deal.
After explaining their background and company story, this is how the Cali Life Co. generates leads at the bottom of the About Us page:
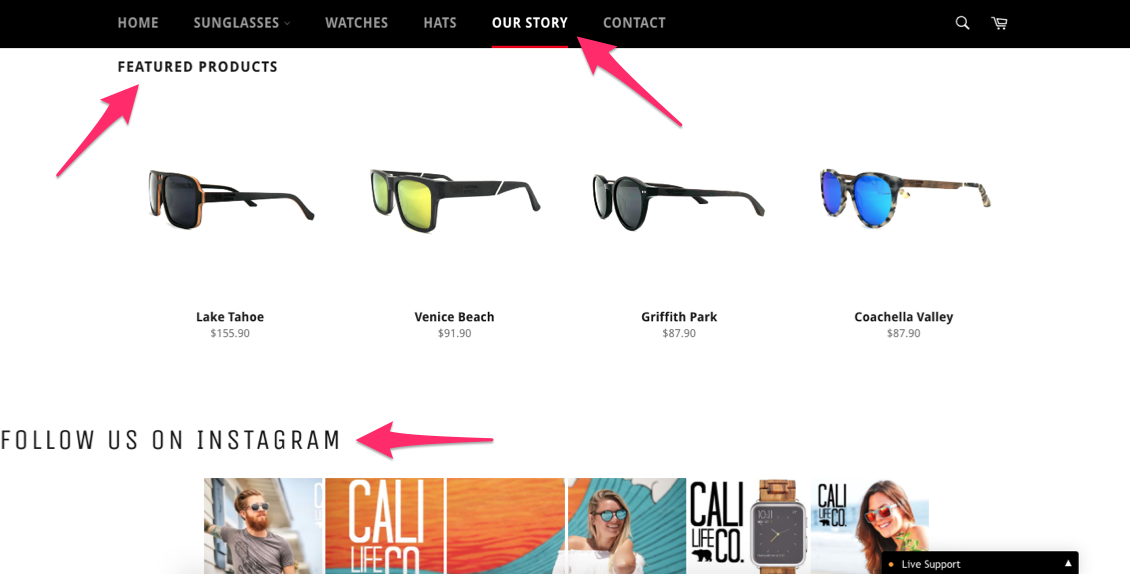
They jump right into showcasing their top products. The Cali Life Co. even has a link to promote their Instagram page.
It’s obvious that their general marketing goals are to drive sales and increase their social media presence. So adding these two sections to their About Us page helps them accomplish those goals.
Conclusion
Let’s recap.
An About page isn’t just about your brand. It also needs to be about your audience and how you can solve their pain points.
You must address their needs and concerns and position your brand as a trustworthy resource so they can feel comfortable doing business with you.
The key elements of your story should include:
- A killer headline
- A brief back story
- Your values
- Answers to visitors’ three big questions
It’s also important to customize your About page in a way that’s interesting and that represents your brand.
Tell a story that keeps the reader hooked. Just make sure you’re speaking in terms everyone can understand.
Add images and instead of just talking about yourself, provide some information and quick bios about your staff.
Ending with a strong CTA will help ensure your new leads get hooked.
By hitting all the right notes, you can establish instant rapport, build trust, and motivate visitors to browse the rest of your site.
When it’s all said and done, this can positively impact multiple metrics, such as increasing the average time spent on site, lowering your bounce rate, and improving conversions.
Follow these tips, and your About page will start generating more business for your company.
Source Quick Sprout https://ift.tt/2FpEeSn
Zacks Trade Review | Active Investing
Are you an active investor who sometimes needs some expert guidance and support in your online trades?
If so, then you might want to try investing with Zacks Trade, a discount broker that offers a variety of valuable trading tools and features.
Take a look below to see some of Zacks Trade’s key features, fees, and pros and cons to decide whether or not you should invest your time and resources with the platform.
Zacks Trade Overview
![]() Zacks Trade is a subsidiary of Zacks Investment Research, a reputable investment research firm. It is an online discount brokerage company that is accessible to investors in over 200 countries across the globe.
Zacks Trade is a subsidiary of Zacks Investment Research, a reputable investment research firm. It is an online discount brokerage company that is accessible to investors in over 200 countries across the globe.
Zacks Trade makes trading available in at least 91 exchanges in 19 countries worldwide. This brokerage firm was born out of a partnership between Zacks Investment Research and Interactive Brokers committed to offering top-of-the-line investment tools at affordable prices.
It is thus driven by the cost-effective trading capabilities of Interactive Brokers and the robust research tools of Zacks Investment Research.
Zacks Trade Platforms
In fact, Zacks Trade has some of the lowest trading fee schedules in the brokerage market. It offers four different special trading platforms:
- Client Portal
- Online Platform – Zacks Trader
- Desktop Platform – Zacks Trade Pro
- Mobile Platform
You can choose the best platform for your needs at no extra cost. Moreover, Zacks Trade offers live support from human brokers, as well as broker-assisted trades at no additional cost.
With broker-assisted trades, beginner investors can get guidance on the trading processes until they are experienced enough to stand on their own.
Zacks Trade Pricing Plans
Zacks Trade offers some of the most competitive prices in the industry. ETFs and stocks that trade for at least $1 per share cost $0.01. You’ll need to spend a minimum of $3.
ETFs and stocks that trade for less than $1 per share go for 1 percent of the trade value. You’ll need to invest at least $3. When it comes to options trading, the first contract will cost you $3, and every additional contract costs $0.75.
Zacks Trade charges no on-going fees on investment accounts. However, you will need at least $2,500 to open an account. You won’t pay a dime to use any of the brokerage company’s platforms.
Zacks Trade Key Features
Zacks Trade offers a variety of features to ensure you have an excellent trading and investing experience. Let’s look at some of the most remarkable features:
- Basket Trader: You can get this tool on Zacks Trade Pro. It’s designed to import baskets of stock order and execute them quickly.
- SpreadTrader: This tool allows you to create and manage complex options orders. The tool makes it easy to close or reverse spread positions.
- Market Scanners: This feature helps to evaluate investments based on your desired parameters.
- Rebalance Portfolio: This tool makes it easy and quick to rebalance your entire portfolio to suit your investment goals and risk tolerance.
- Options Strategy Lab: This tool can help you find potentially profitable strategies once you provide your price or volatility forecast for the underlying stock.
- Volatility Lab: This is a collection of volatility tools that give you an overview of previous and future readings.
- Probability Lab: This tool provides simple options probabilities that completely adjust according to your forecasts.
How to Invest with Zacks Trade
How Zacks Trade Works
Zacks Trade offers two types of accounts:
- Margin accounts: A margin account will enable you to borrow funds over and above your account balance for investment purposes.
- Cash accounts: With a cash account, you’re only allowed to trade with the funds you’ve deposited in that account.
You can get a feel of how Zacks Trade works by trading on a demo account. This allows you to start with $1 million in virtual funds to trade stocks, mutual funds, exchange-traded funds (ETFs), and other securities. Once, you understand the ins and outs of trading, you can start trading with real money.
While Zacks Trade is designed for self-directed investors, it gives you access to live brokers in case you need some form of guidance with your trades. These brokers are, however, available only during regular business hours.
Learn more about getting started with Zacks Trade>>
Zacks Trade Research Tools
You can access research tools on any of Zacks Trade’s trading platforms. However, you may not get some features on the mobile trading platform, thanks to its limited functionality. One of the most remarkable research tools that this brokerage firm offers is the stock scanner.
With the stock scanner, you can search a particular exchange for various parameters, such as most active and top gainers in terms of percentage. You will get a list of stocks after running the tool.
Other powerful research tools geared to help you make more informed trading and investment decisions include:
- A bond scanner
- A volatility lab
- Options chains with a strategy builder
- Level II quotes
Zacks Trade Security Features
With Zacks Trade, you don’t have to worry about the security of your personal information and investments. The company employs a number of strategies to ensure the safety of your data. For example, it uses 128-bit SSL encryption to secure the connection between your device and the platform.
Moreover, the company has dedicated security personnel that uses cutting-edge monitoring technology to detect suspicious activities and notify you of any potential threats. You will also be logged-off automatically after a given period.
Likewise, you’ll be denied access to your account after a given number of unsuccessful login attempts. These measures ensure that no unauthorized persons can access your account. Your investments are also protected by the Securities Investor Protection Corporation (SIPC).
If Zacks Trade gets into trouble and closes down, you will get your investments back up to $500,000 in securities and cash. As if that protective is not enough, Zacks Trade offers extra insurance coverage through private insurance firms to ensure the safety of your account.
Is Zacks Trade Ideal for You?
If you are an equity trader who usually places plenty of orders of less than 500 shares, Zacks Trade’s commission schedule and technology will benefit you in a great way.
This platform can also be a great option if you are an active options trader.
If you are a day trader, however, Zacks Trade may not work well for you. The platform is not explicitly designed for day trading, so you might be better off with one of the platforms on our list of top online brokers.
Nonetheless, Zacks Trade offers an enticing per-share commission schedule and can also be a good choice if you are looking to trade on the global markets.
The Pros and Cons of Zacks Trade
The Pros
- Access to foreign stock exchanges
- Great pricing on bonds
- Great commission schedules for equity trades below 500 shares
The Cons
- No commission-free ETF’s
- No cash management features
Bottom Line
With three powerful trading platforms, Zacks Trade offers high-end trading tools at cost-friendly prices.
If you are looking for a platform that provides cost-effective trading, you can’t wrong with Zacks Trade. The platform is ideal for self-directed, active traders.
However, it may not be a good option for an active day trader, as the commissions can get expensive with frequent trades.
Start investing with Zacks Trade>>
The post Zacks Trade Review | Active Investing appeared first on Good Financial Cents®.
Source Good Financial Cents® https://ift.tt/2W9DG8x
الاشتراك في:
التعليقات (Atom)